RESTful API Lab 2
Steps and Files
- application.yml
- src/main/resources/application.yml
- schema.sql
- src/main/resources/schema.sql
- Restart the server
- H2 Console
- Entity Package
- Entity Classes
- /com/tus/accounts/entity/Accounts.java
- /com/tus/accounts/entity/Customer.java
- /com/tus/accounts/entity/BaseEntity.java
- Repository
- /com/tus/accounts/repository/AccountsRepository.java
- /com/tus/accounts/repository/CustomerRepository.java
- DTOs Accounts & Customer
- /com/tus/accounts/dto/AccountsDto.java
- /com/tus/accounts/dto/CustomerDto.java
- DTOs Response & Error
- /com/tus/accounts/dto/ResponseDto.java
- /com/tus/accounts/dto/ErrorResponseDto.java
Lab#2 Configuring H2 DB and YAML application.properties
In this lab we will continue from the previous lab and configure the application to use an in-memory H2 database.
1. application.yml
Rename application.properties as application.yml and update with following properties (file provided)
| application.yml |
|---|
 1
 2
 3
 4
 5
 6
 7
 8
 9
10
11
12
13
14
15
16 | server:
port: 8080
spring:
datasource:
url: jdbc:h2:mem:testdb
driverClassName: org.h2.Driver
username: sa
password: ''
h2:
console:
enabled: true
jpa:
database-platform: org.hibernate.dialect.H2Dialect
hibernate:
ddl-auto:update
show-sql: true
|
2. schema.sql
Create a file called schema.sql (provided) in the resources folder with the following data.
| schema.sql |
|---|
 1
 2
 3
 4
 5
 6
 7
 8
 9
10
11
12
13
14
15
16
17
18
19
20
21 | CREATE TABLE IF NOT EXISTS `customer` (
`customer_id` int AUTO_INCREMENT PRIMARY KEY,
`name` varchar(100) NOT NULL,
`email` varchar(100) NOT NULL,
`mobile_number` varchar(20) NOT NULL,
`created_at` date NOT NULL,
`created_by` varchar(20) NOT NULL,
`updated_at` date DEFAULT NULL,
`updated_by` varchar(20) DEFAULT NULL
);
CREATE TABLE IF NOT EXISTS `accounts` (
`customer_id` int NOT NULL,
`account_number` int AUTO_INCREMENT PRIMARY KEY,
`account_type` varchar(100) NOT NULL,
`branch_address` varchar(200) NOT NULL,
`created_at` date NOT NULL,
`created_by` varchar(20) NOT NULL,
`updated_at` date DEFAULT NULL,
`updated_by` varchar(20) DEFAULT NULL
);
|
3. Restart the server
It will start on port 8080 based on yml file.
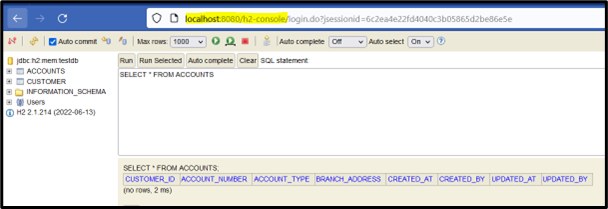
4. H2 Console
Go to the h2-console in the browser. You should see the two tables have bee created.
Now we will write Spring Data JPA entities & repositories to interact with DB tables
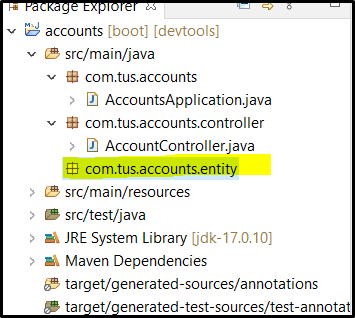
5. Entity Package
Create a new package for the entity classes as show below.
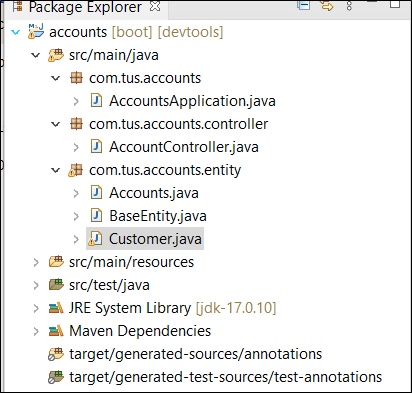
6. Entity Classes
Add the classes BaseEntity, Accounts and Customers (given) and examine the code.
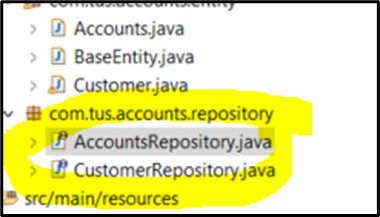
7. Repository
Now Add the Repository interfaces
| CustomerRepository.java |
|---|
 1
 2
 3
 4
 5
 6
 7
 8
 9
10
11
12
13
14 | package com.tus.accounts.repository;
import org.springframework.data.jpa.repository.JpaRepository;
import org.springframework.stereotype.Repository;
import com.tus.accounts.entity.Customer;
import java.util.Optional;
@Repository
public interface CustomerRepository extends JpaRepository<Customer, Long> {
Optional<Customer> findByMobileNumber(String mobileNumber);
}
|
| AccountsRepository.java |
|---|
 1
 2
 3
 4
 5
 6
 7
 8
 9
10
11
12
13
14
15
16
17 | package com.tus.accounts.repository;
import java.util.Optional;
import org.springframework.data.jpa.repository.JpaRepository;
import org.springframework.data.jpa.repository.Modifying;
import org.springframework.transaction.annotation.Transactional;
import com.tus.accounts.entity.Accounts;
public interface AccountsRepository extends JpaRepository<Accounts, Long> {
Optional<Accounts> findByCustomerId(Long customerId);
@Transactional
@Modifying
void deleteByCustomerId(Long customerId);
}
|
We will use the Data Transfer Object pattern to transfer data – not the entity classes themselves.
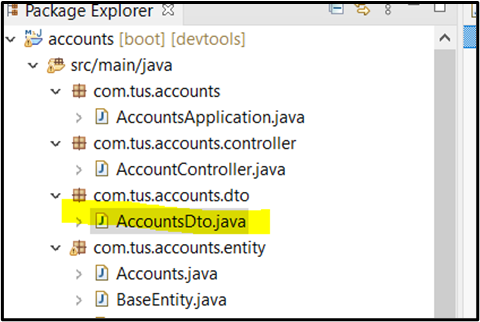
8. DTOs Accounts & Customer
Create a new package with class AccountsDto and CustomerDto. These classes uses Lombok (You may need to turn on annotations in your IDE or install a Lombok jar)
| AccountsDto.java |
|---|
| package com.tus.accounts.dto;
import lombok.Data;
@Data
public class AccountsDto {
private Long accountNumber;
private String accountType;
private String branchAddress;
}
|
| CustomerDto.java |
|---|
| package com.tus.accounts.dto;
import lombok.Data;
@Data
public class CustomerDto {
private String name;
private String email;
private String mobileNumber;
}
|
9. DTOs Response & Error
Also add a ResponseDto and an ErrorResponseDto class
| ResponseDto |
|---|
| package com.tus.accounts.dto;
import lombok.AllArgsConstructor;
import lombok.Data;
@Data
@AllArgsConstructor
public class ResponseDto {
private String statusCode;
private String statusMsg;
}
|
| ErrorResponseDto |
|---|
1
2
3
4
5
6
7
8
9
10
11
12
13
14
15
16
17 | package com.tus.accounts.dto;
import java.time.LocalDateTime;
import org.springframework.http.HttpStatus;
import lombok.AllArgsConstructor;
import lombok.Data;
@Data
@AllArgsConstructor
public class ErrorResponseDto {
private String apiPath;
private HttpStatus errorCode;
private String errorMessage;
private LocalDateTime errortime;
}
|