Lab 18
Steps and Files
- Create Repo
- accounts.yml
- accounts-qa.yml
- accounts-prod.yml
- cards.yml
- cards-qa.yml
- cards-prod.yml
- loans.yml
- loans-qa.yml
- loans-prod.yml
- Modify application.yml
- application.yml
- Restart and Test
- Test cards /contact-info using Postman
- Add Encryption
- application.yml
- Config Server Encrypt Endpoint
- GET /contact-info
- Test Decrypt Endpoint
Lab#18 Reading configurations from a github repo and encryption
This is the recommended approach to reading configuration data. A github repo can be more secure and support versioning and auditing. We also look at how to encrypt a parameter.
1. Create Repo
Step#1 Create a repo on Bitbucket or Github with the config files.
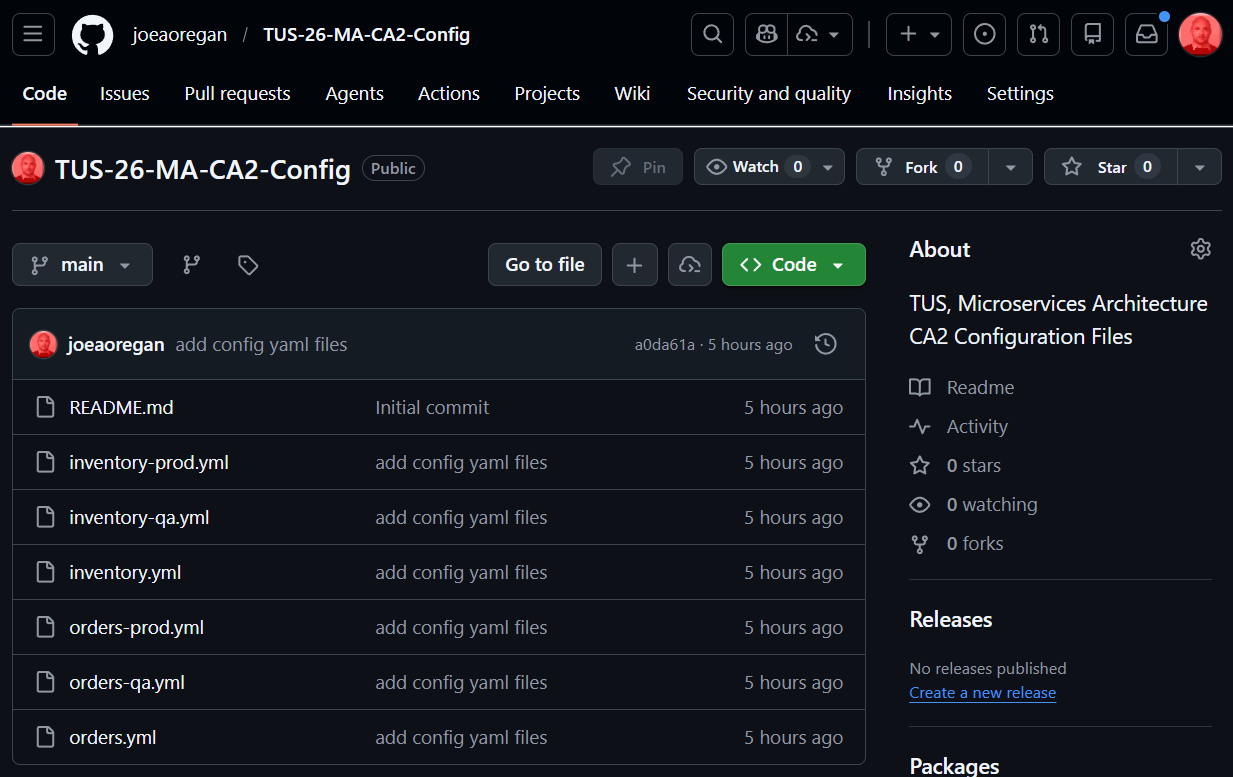
Figure 1. GitHub Repo
2. Modify application.yml
Step#2: Now go to the application.yml in the configserver and make the modifications shown below.If using Bitbucket, the password is the AppPassword.
| configserver application.yml | |
|---|---|
1 2 3 4 5 6 7 8 9 10 11 12 13 14 15 16 17 18 19 20 21 22 23 | |
3. Restart and Test
Step #3 Now restart the config server and the microservices. Test that the properties are still fetched correctly.
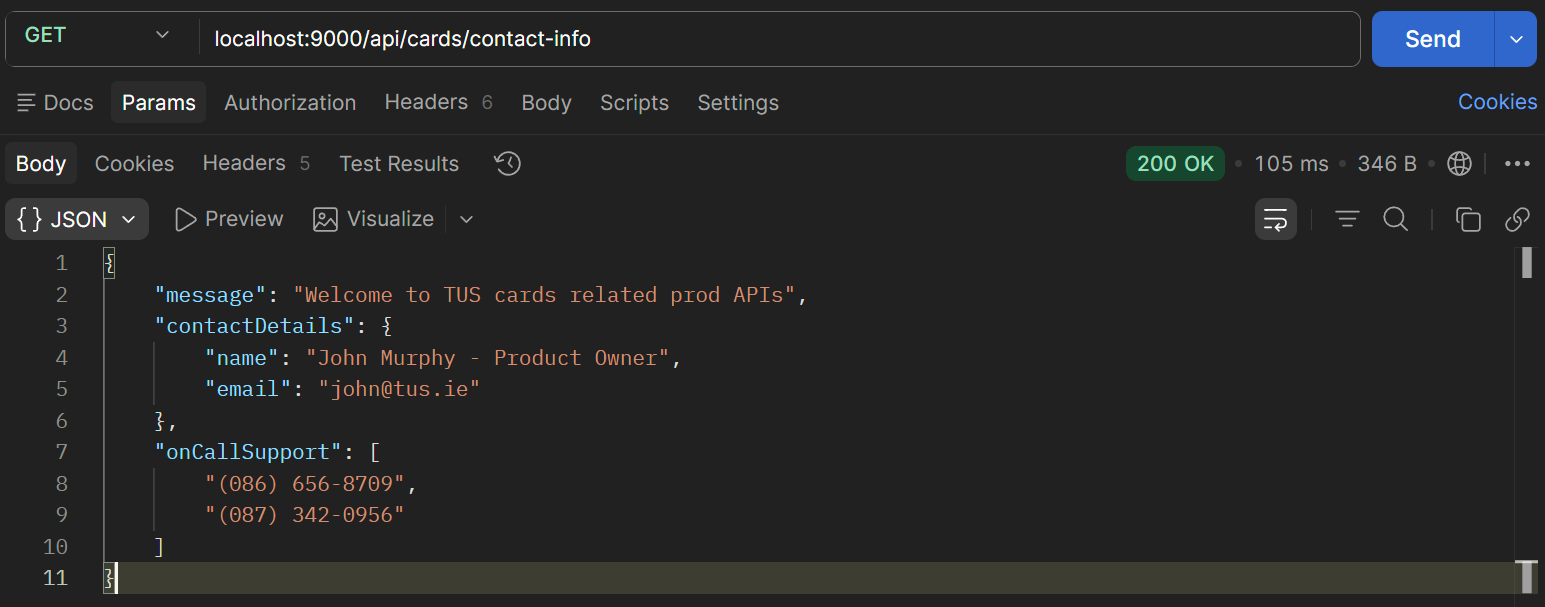
Figure 2. GET cards /contact-info
4. Add Encryption
Step#3 Adding encryption Add an encryption key to application.yml for the config server. The key can be anything you want, but the more complex the better.
| configserver application.yml | |
|---|---|
18 19 20 21 22 23 24 25 | |
5. Config Server Encrypt Endpoint
Step #5 Restart the config server. Invoke the encrypt endpoint to encrypt a value e.g. email. Note type is Text. And we receive an encrypted value back. Now take the encrypted value and place it in one of the configuration property files in the git repo. Note the use of “{cipher} before the encrypted value
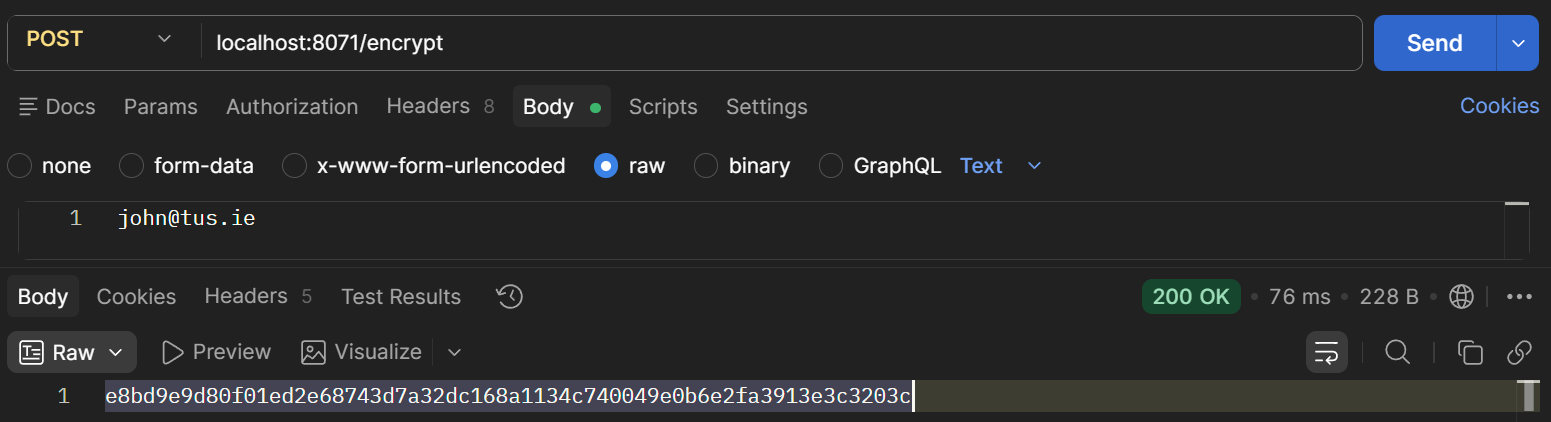
Figure 3. Encrypt endpoint
| accounts-prod.yml | |
|---|---|
1 2 3 4 5 6 7 8 9 10 | |
6. GET /contact-info
Step #6 Invoke the contact-info endpoint for the accounts microservice. The decrypted value will be displayed.
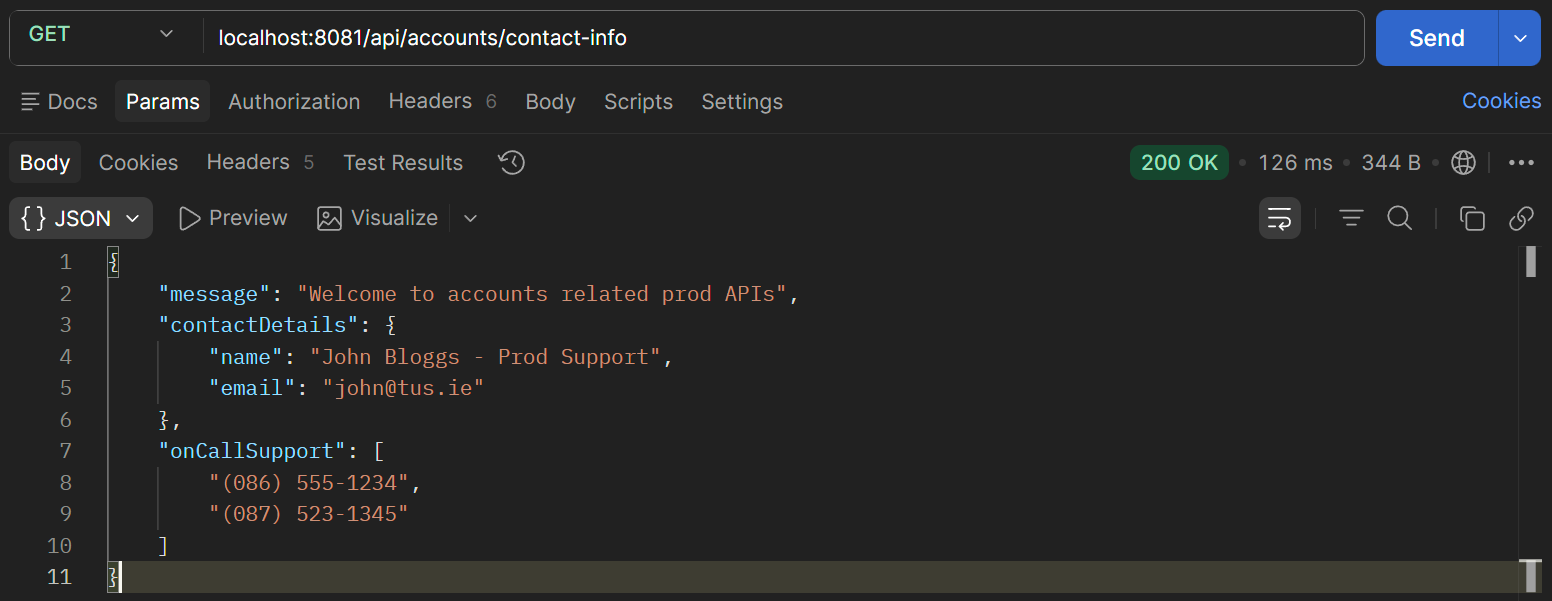
Figure 4. Decrypted Value Displayed
7. Test Decrypt Endpoint
Step 7. Test out the decrypt endpoint that is available.
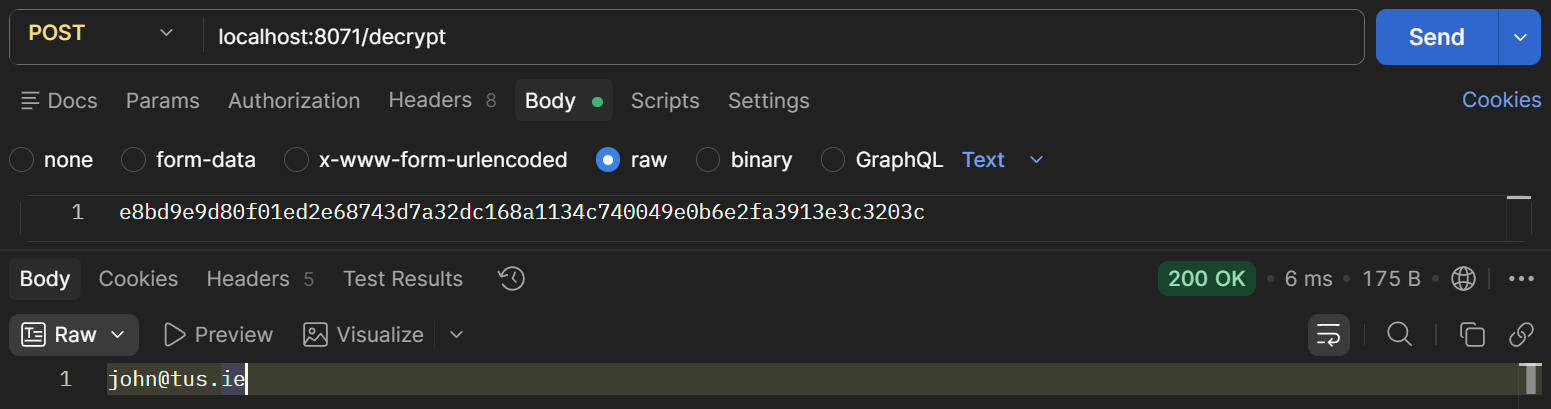
Figure 5. Decrypt Endpoint