Lab#36 Setup AUTH server with KeyCloak
Step#1 You can run Keyclock as a docker container or just directly on jdk17
To run without docker, see https://www.keycloak.org/getting-started/getting-started-zip
If running as application then.

Figure 1. Download Keycloak
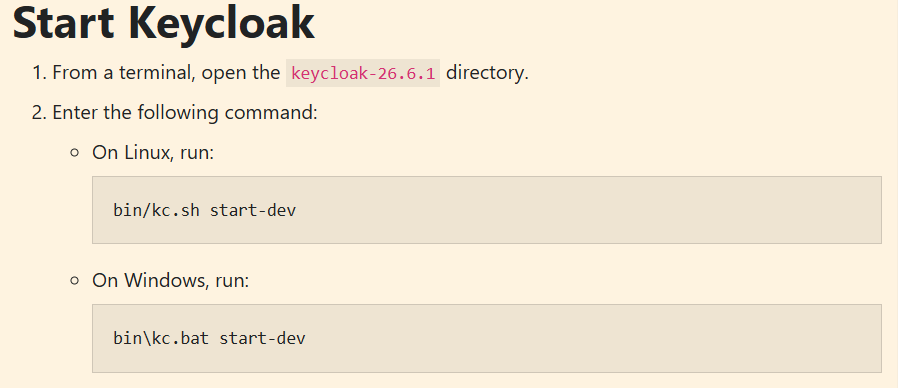
Figure 2. Start Keycloak
Start the keycloak server and open the keycloak dashboard.
Keycloak Dashboard:
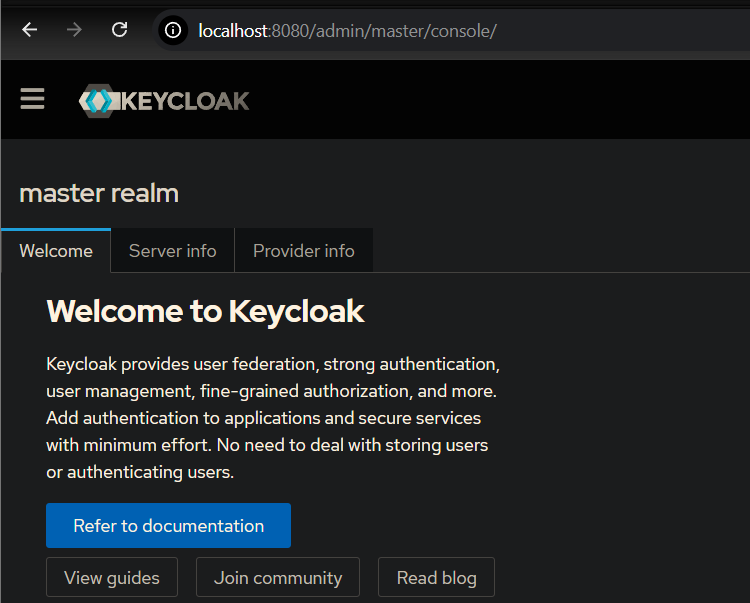
Figure 3. Keycloak Dashboard
A realm is a boundary where you can create a set of client or user credentials.
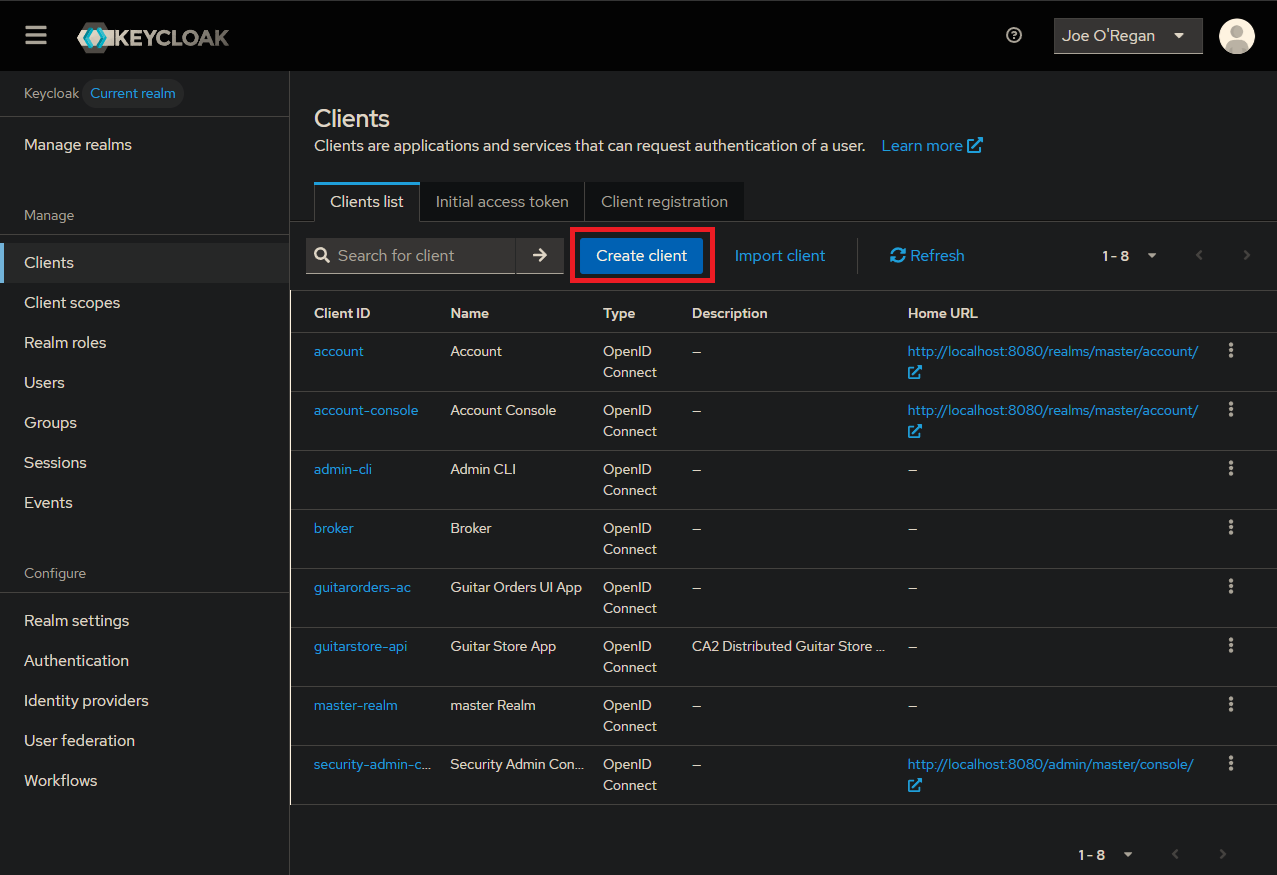
Figure 4. Keycloak Realm
Minimum Java version is 17.
Step#2 Register client details with KeyCloak. Select “Clients” option and “Create Client”
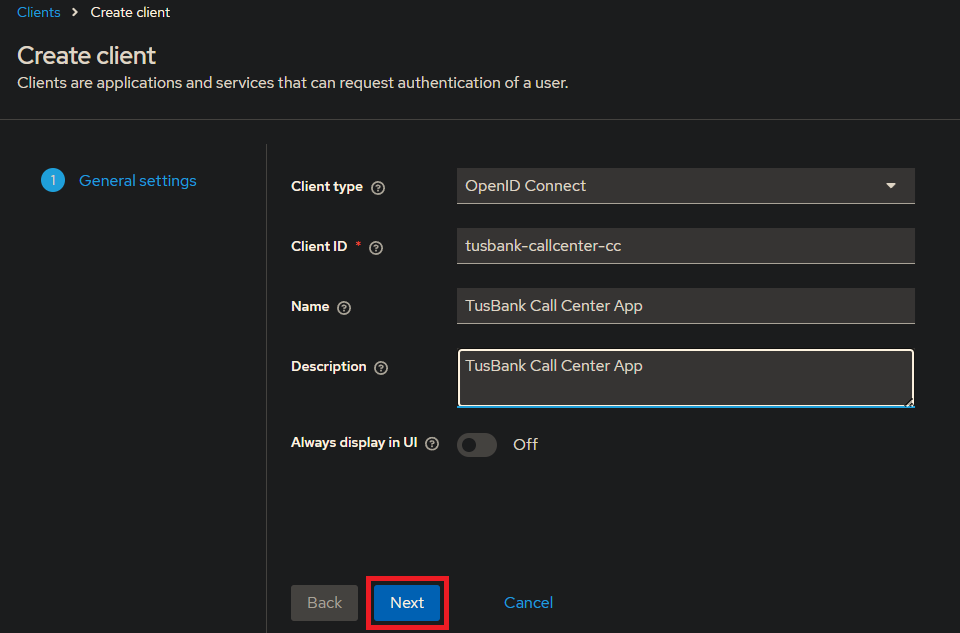
Figure 5. Clients > Create Client
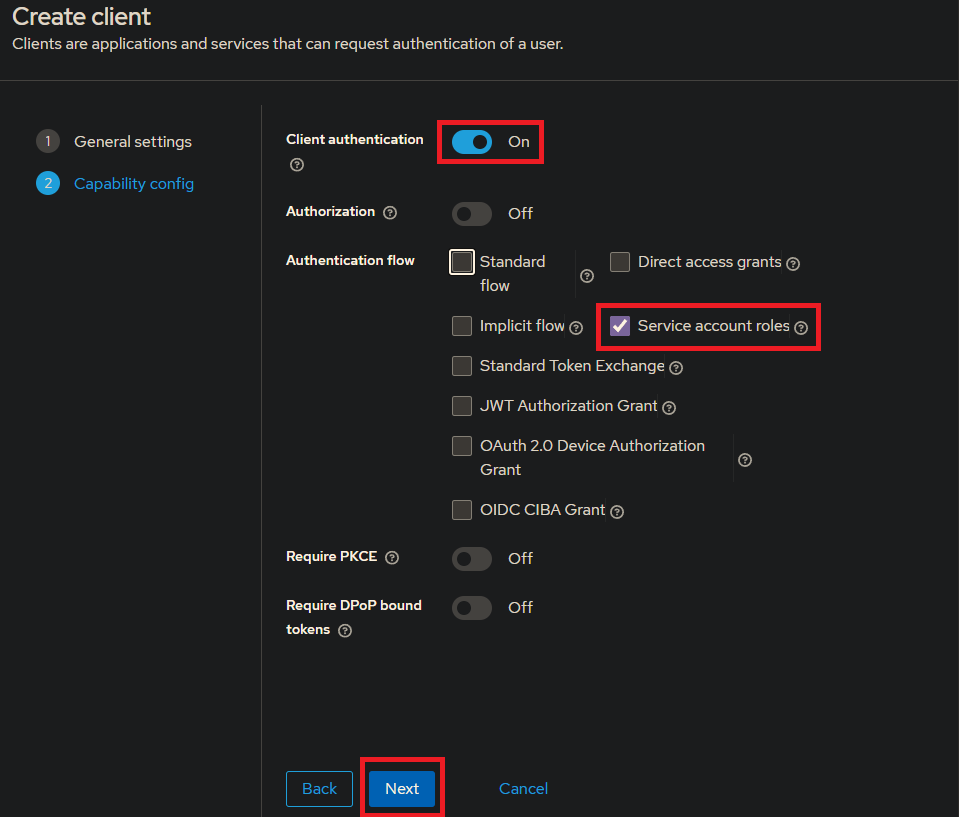
Figure 6. Create Client 1
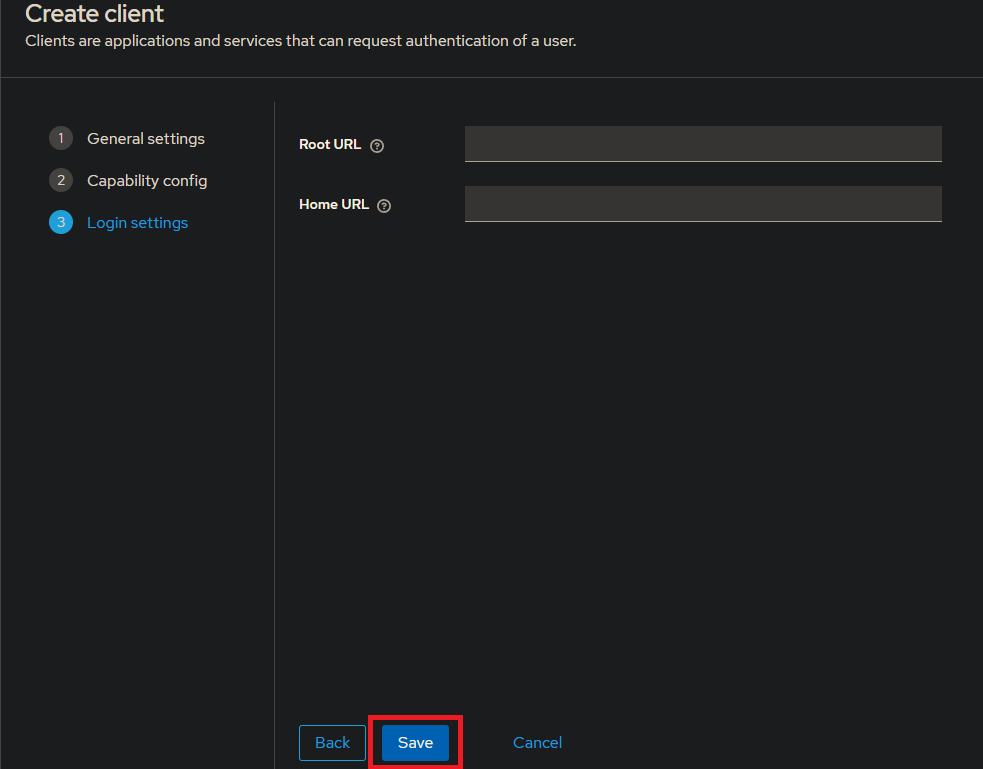
Figure 7. Create Client 2
Leave Root URL and Home URL empty and select “Save”
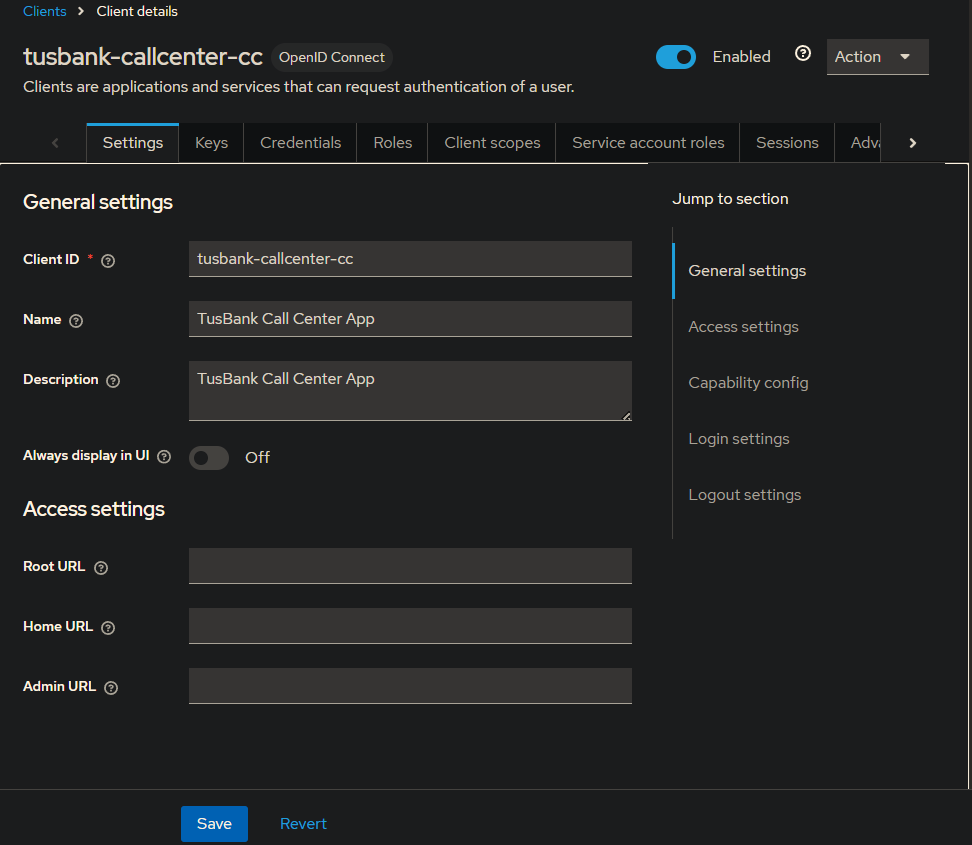
Figure 8. Create Client 3
Credentials have been generated by KeyCloak and can be seen here.
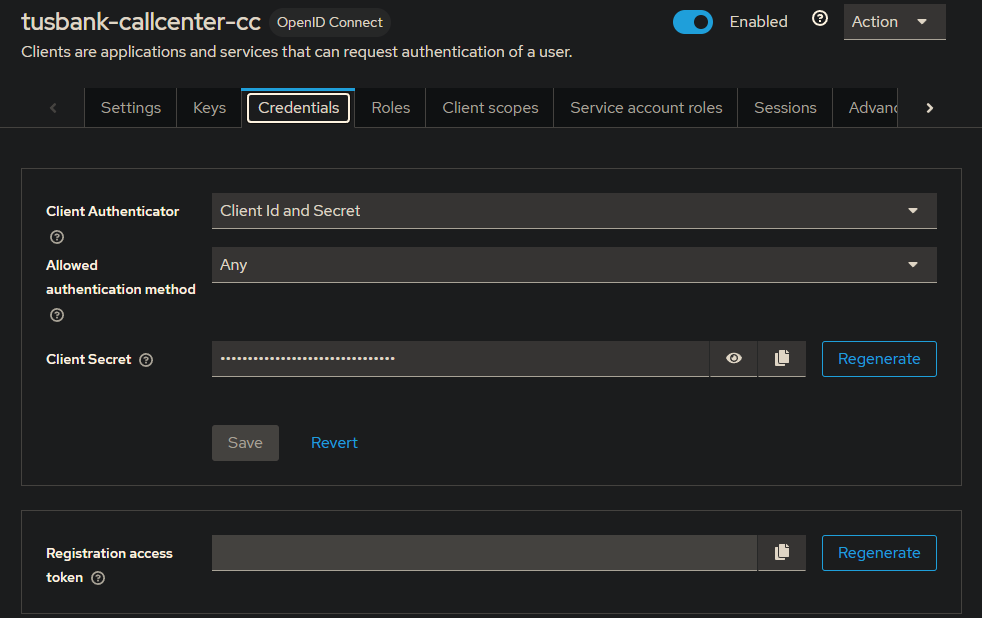
Figure 9. Client Secret
Step#3 Getting an access token using the client details. In the keycloak, click on the realm settings
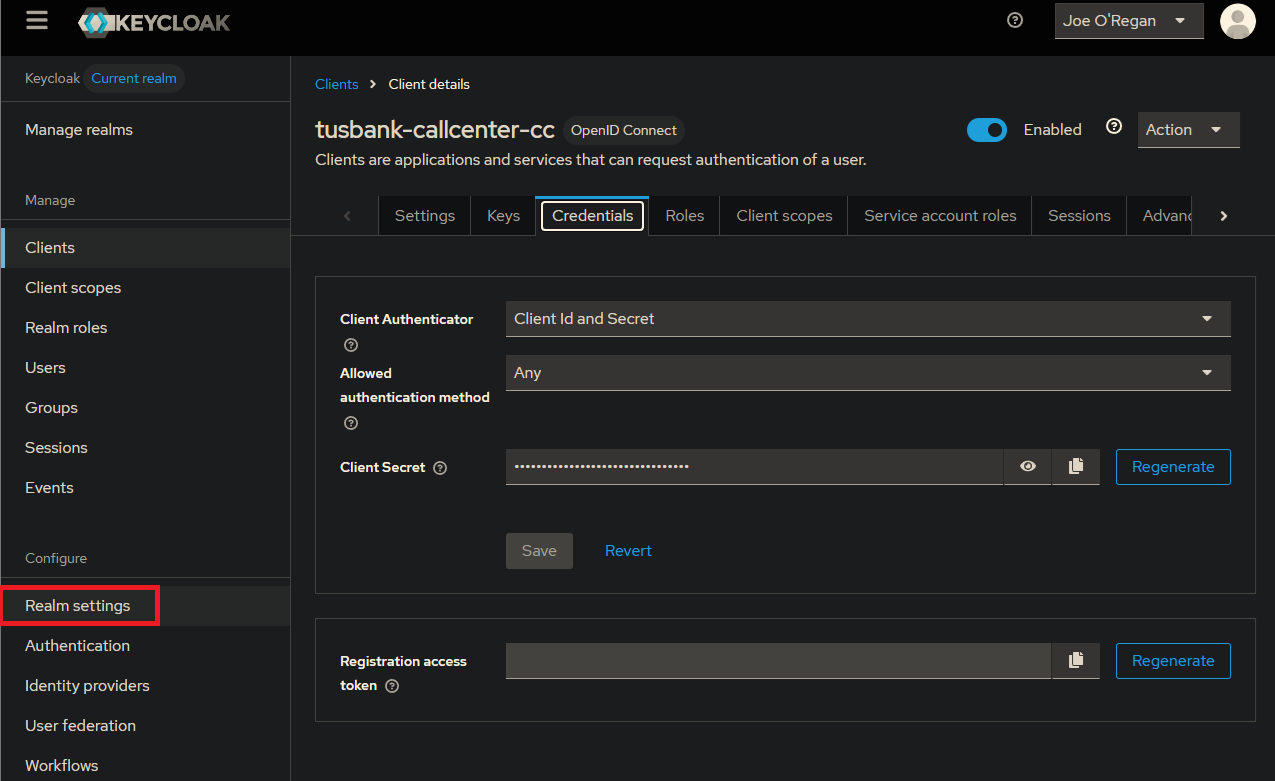
Figure 10. Realm Settings
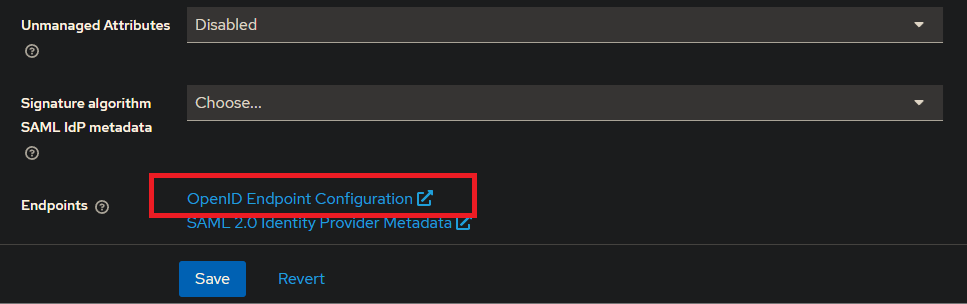
Figure 11. OpenID Endpoint Configuration
Find the token endpoint
openid-configuration: http://localhost:8080/realms/master/.well-known/openid-configuration
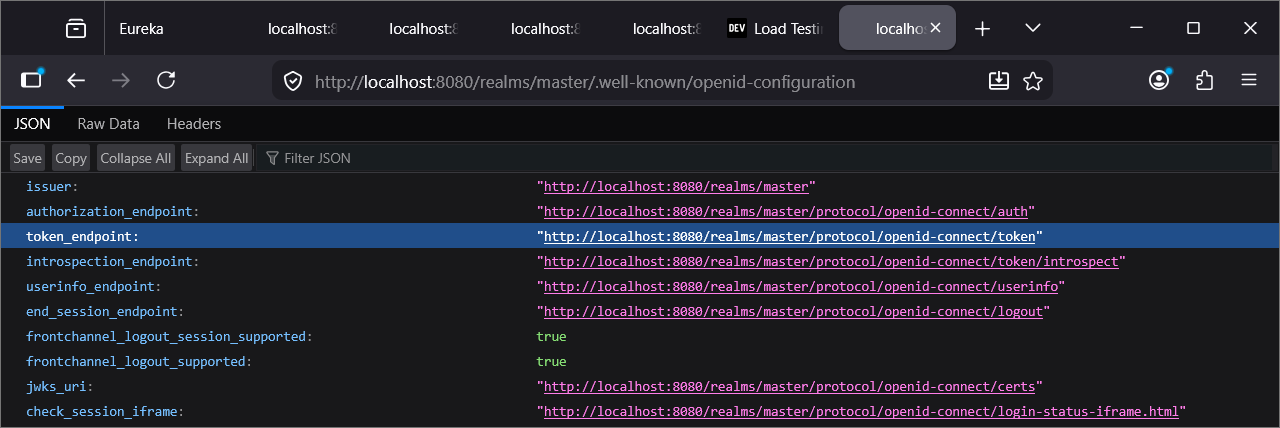
Figure 12. Token Endpoint
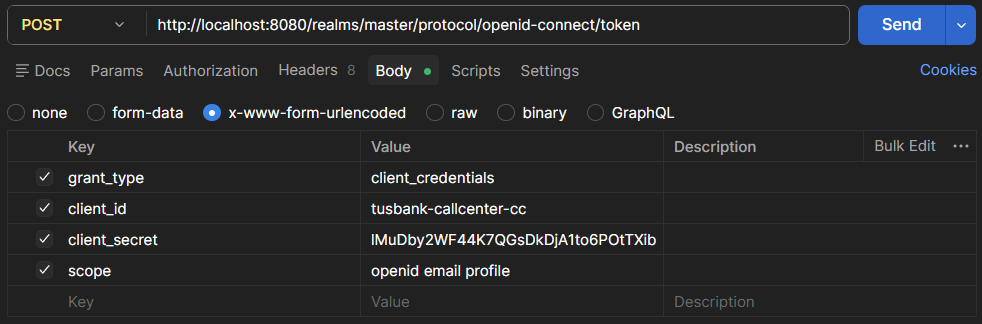
Figure 13. Postman x-www-form-urlencoded
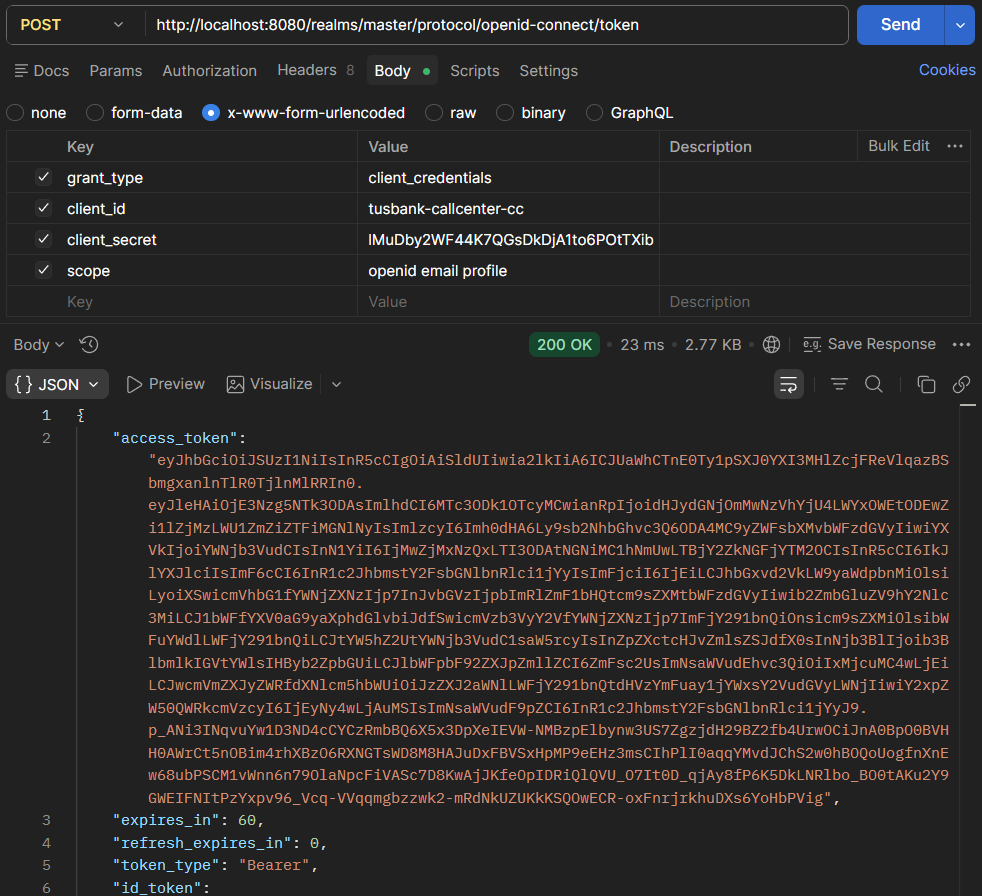
Figure 14. Access Token
Token can be decoded. Examine the contents.
JWT.io
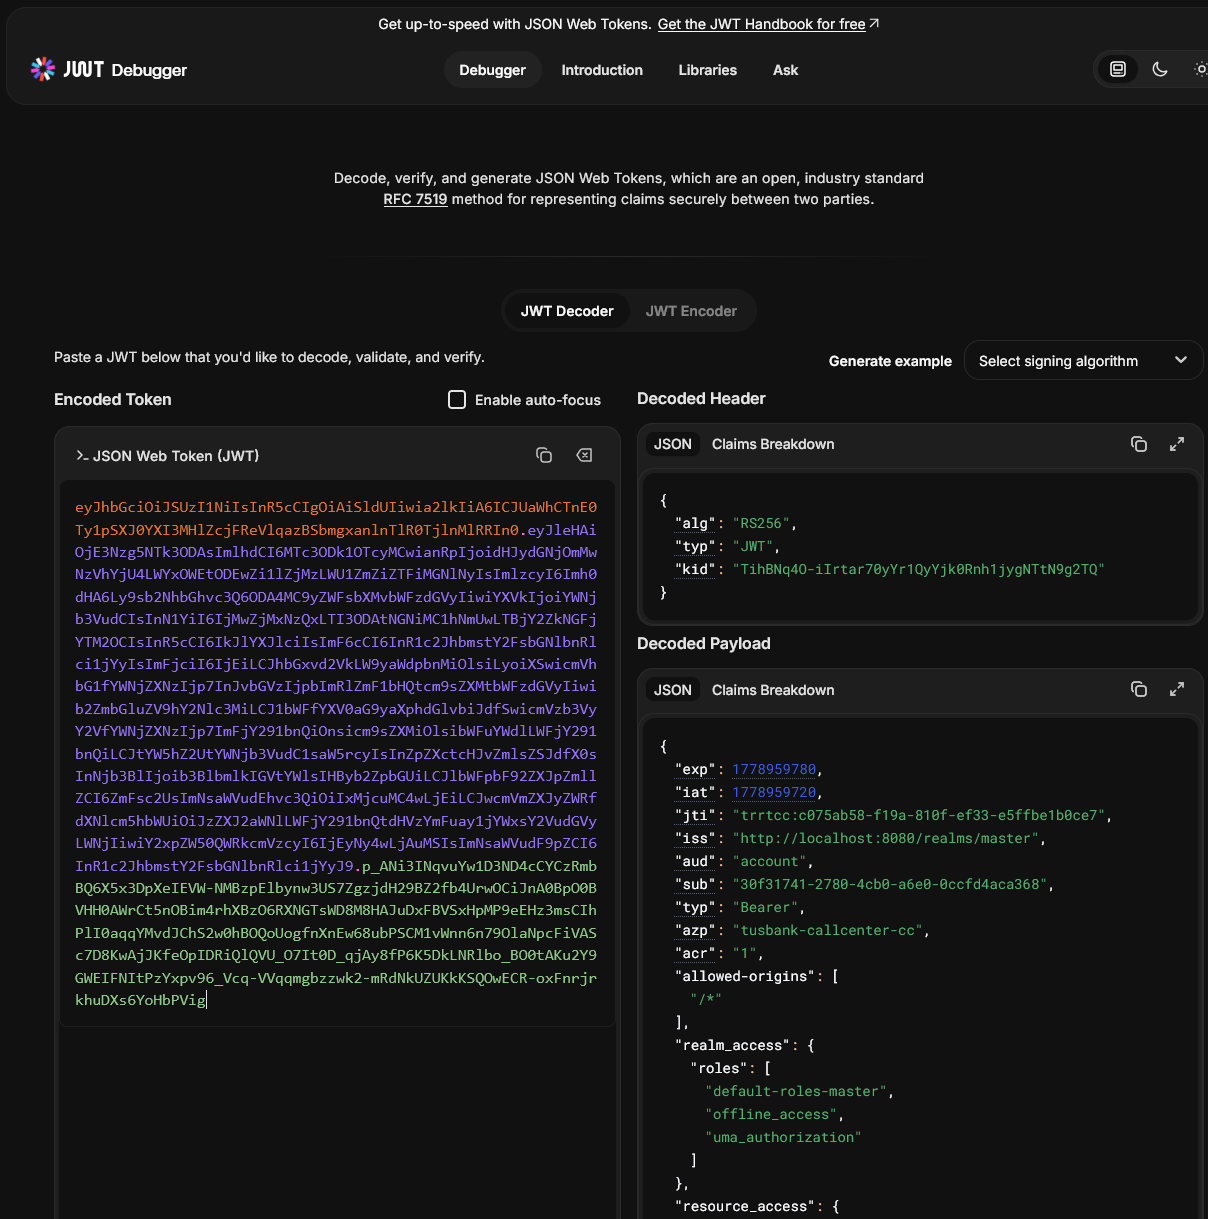
Figure 15. JWT Decoded
Step#4 Convert our gateway server to a resource server. Then we should send the access token to the resource server. First three new dependencies are need in the gatewayserver.
| Gateway: pom.xml | |
|---|---|
45 46 47 48 49 50 51 52 53 54 55 56 | |
Add a new class in the gateway server
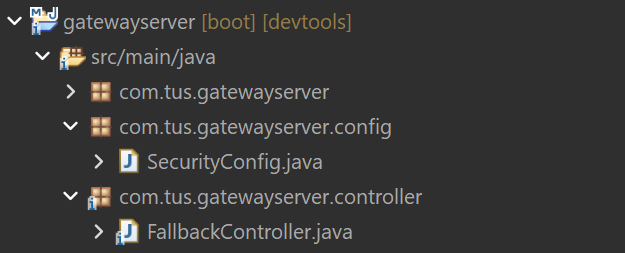
Figure 16. SecurityConfig Class
| SecurityConfig.java | |
|---|---|
1 2 3 4 5 6 7 8 9 10 11 12 13 14 15 16 17 18 19 20 21 22 23 24 25 26 27 | |
And in application.yml add the url for the KeyCloak server.
| application.yml | |
|---|---|
25 26 27 28 29 | |
Restart the gateway server. Now try a "GET" request and it should be successful. No security expected.
GET localhost:8072/tusbank/accounts/api/contact-info
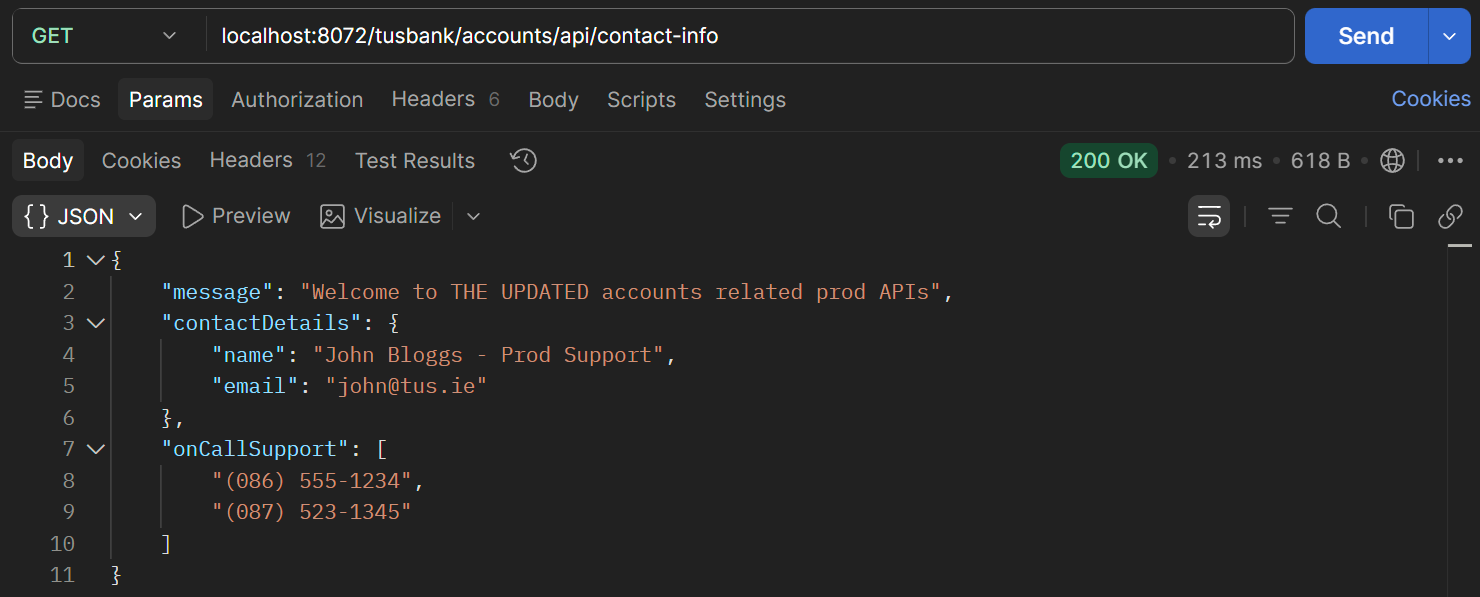
Figure 17. Postman Accounts Contact Info Endpoint
GET localhost:8072/tusbank/cards/api/cards/java-version

Figure 18. Postman Cards Java Version Endpoint
GET localhost:8072/tusbank/loans/api/build-info

Figure 19. Postman Loans Build Info Endpoint
Now try a method other than GET – 401 – Unauthorized is returned.
POST localhost:8072/tusbank/accounts/api/accounts
{
    "name": "Joe Security",
    "email": "joe@gamil.com",
    "mobileNumber": "5432154321"
}
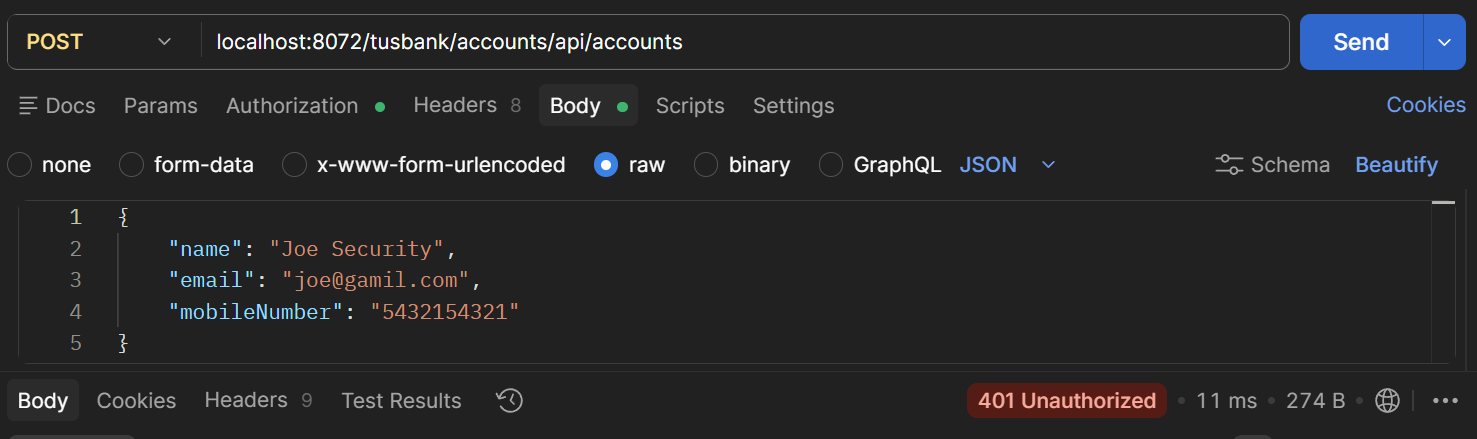
Figure 20. Postman Post New Account
To allow POST etc. ,we need to fetch the access token. The fetching of the token can be done as part of the Postman request.
We could copy in the token into the request header or use the feature of postman to get an access token as part of the request by setting authorization information in the Postman request..
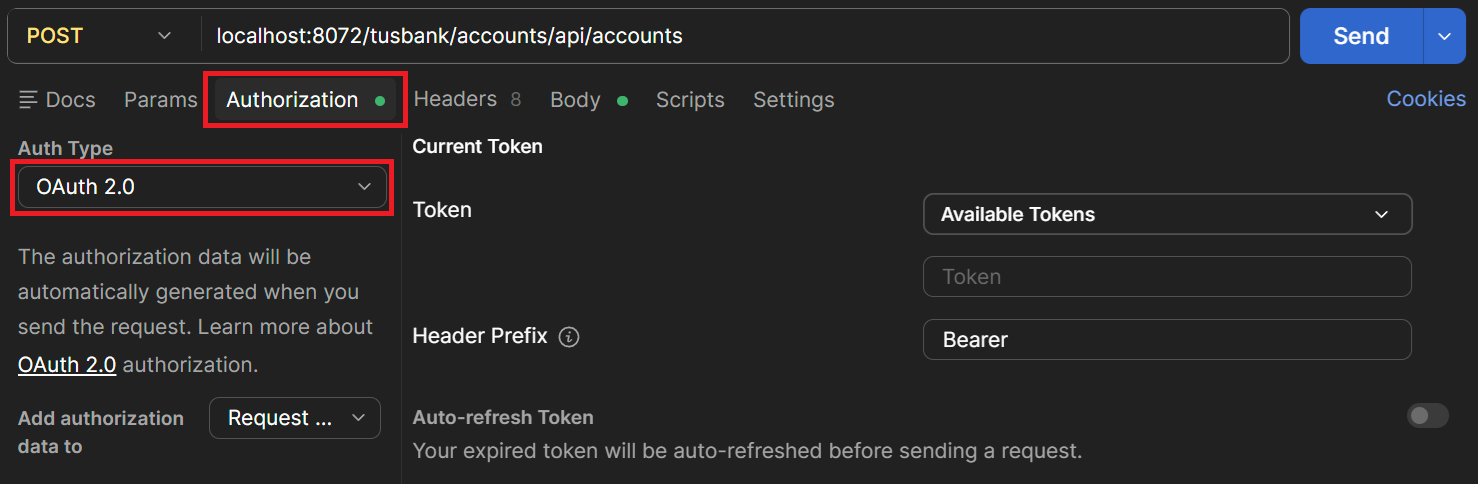
Figure 21. Postman OAuth 2.0 Token
Scroll down to “Configure New token”
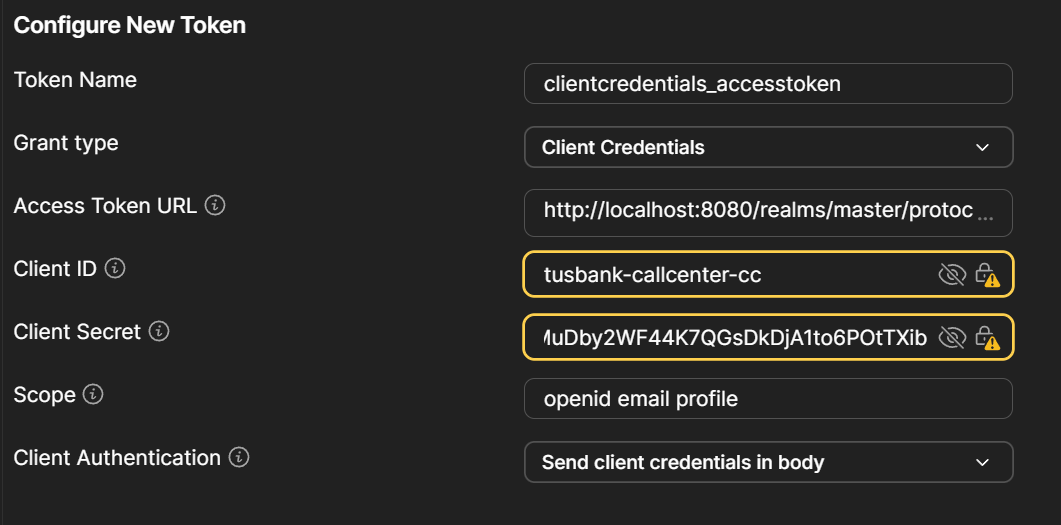
Figure 22. Configure New Token

Figure 23. Get New Access Token
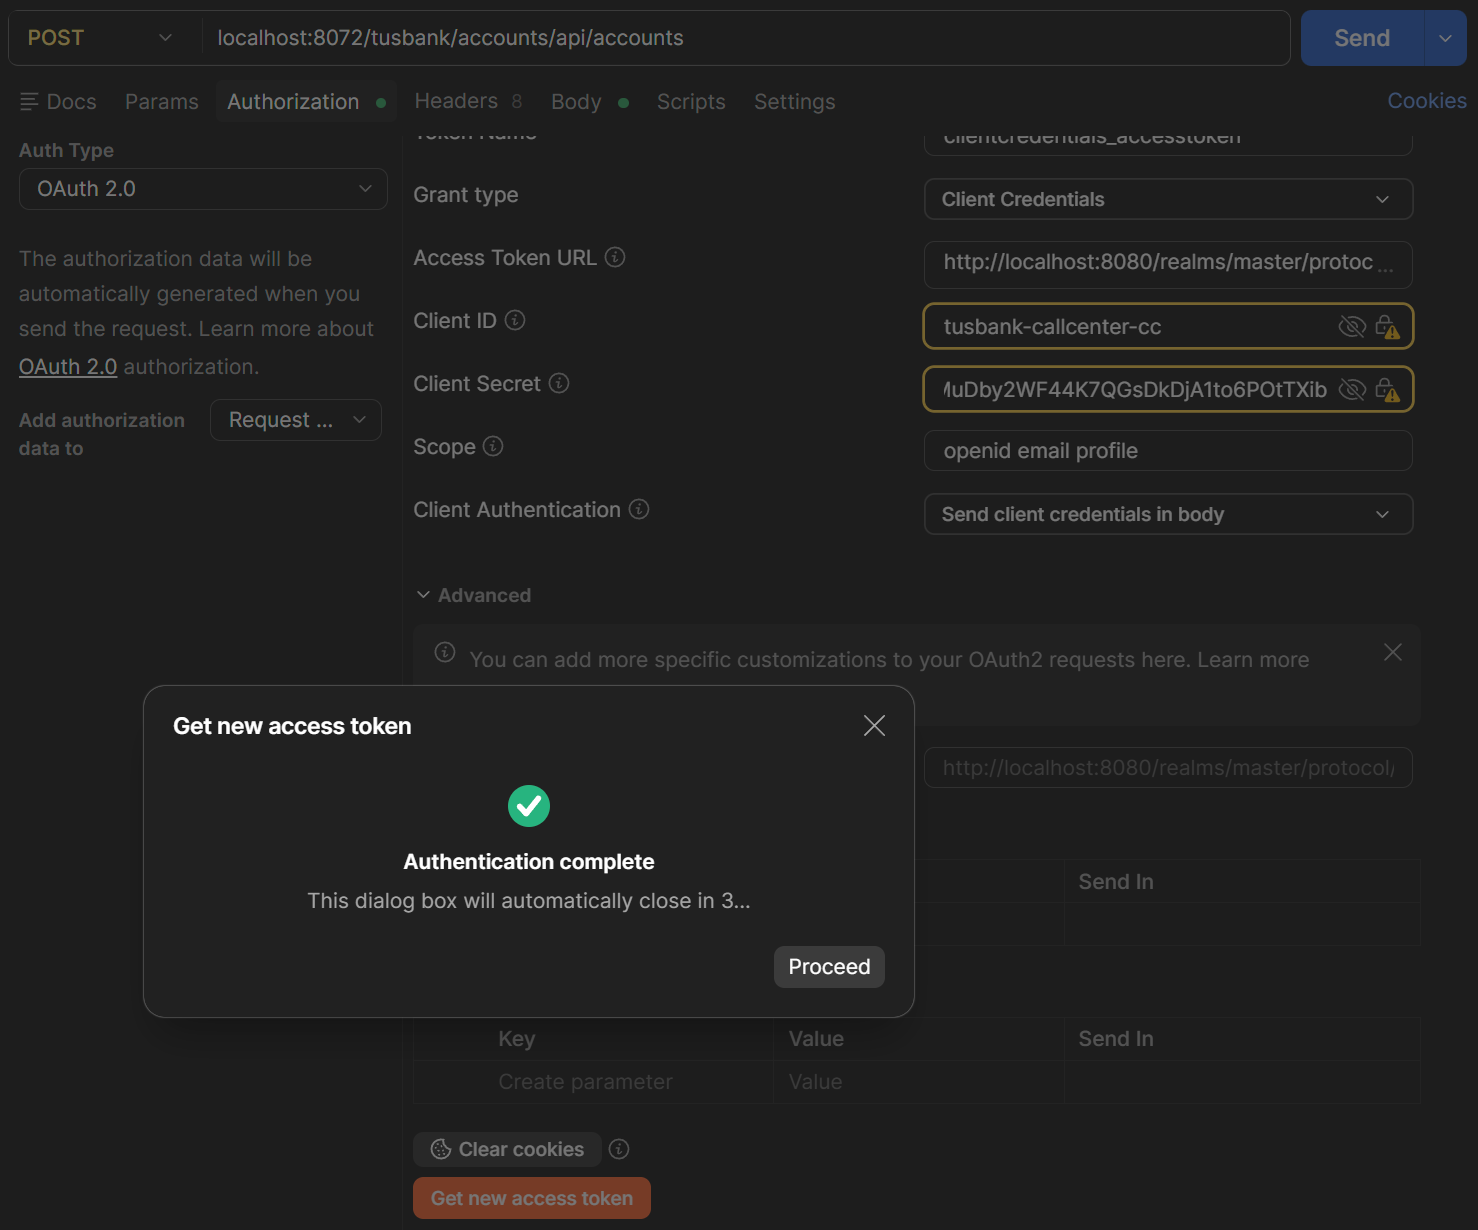
Figure 24. Authentication Complete
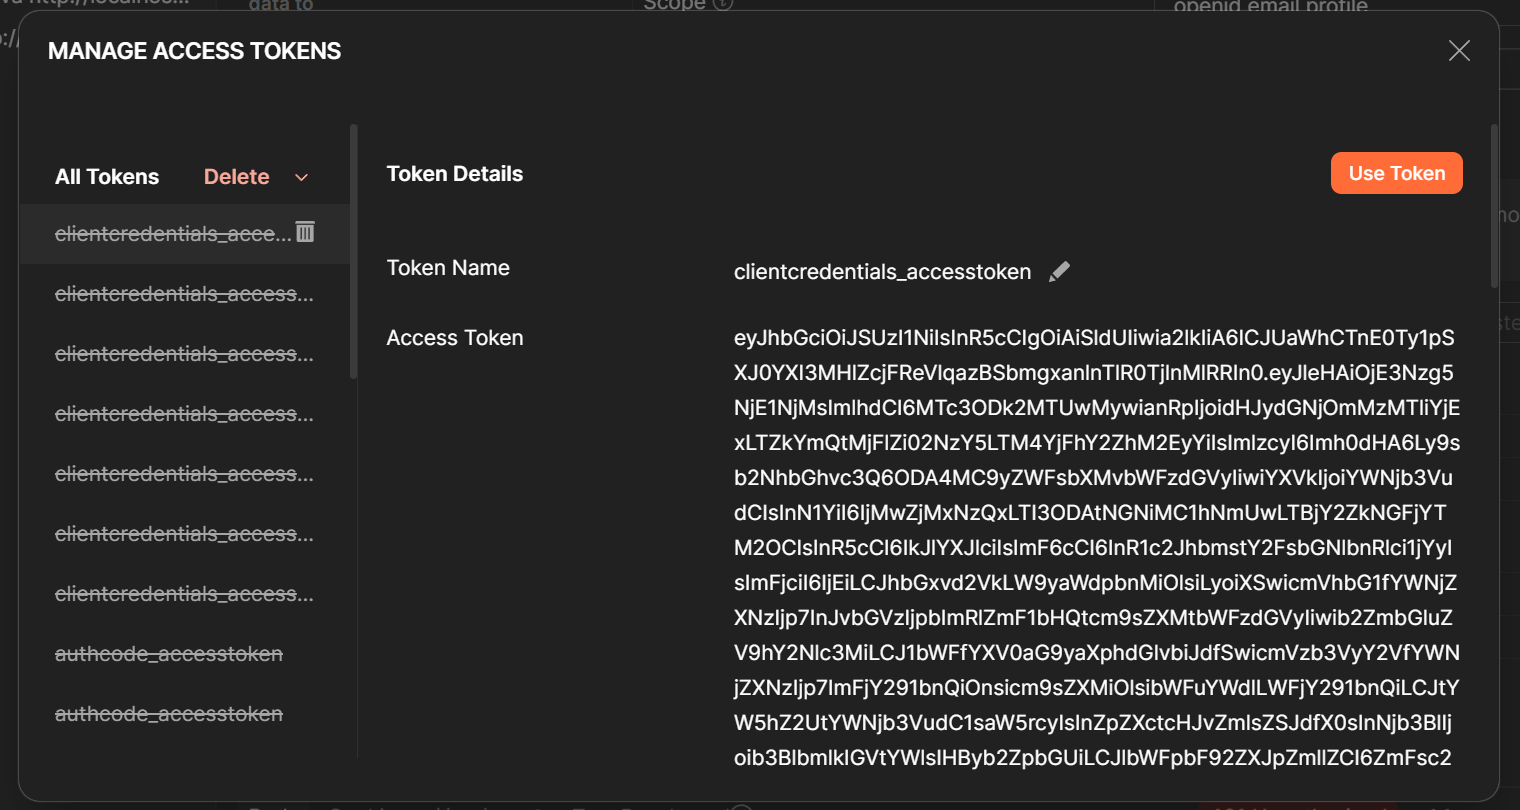
Figure 25. Use Token
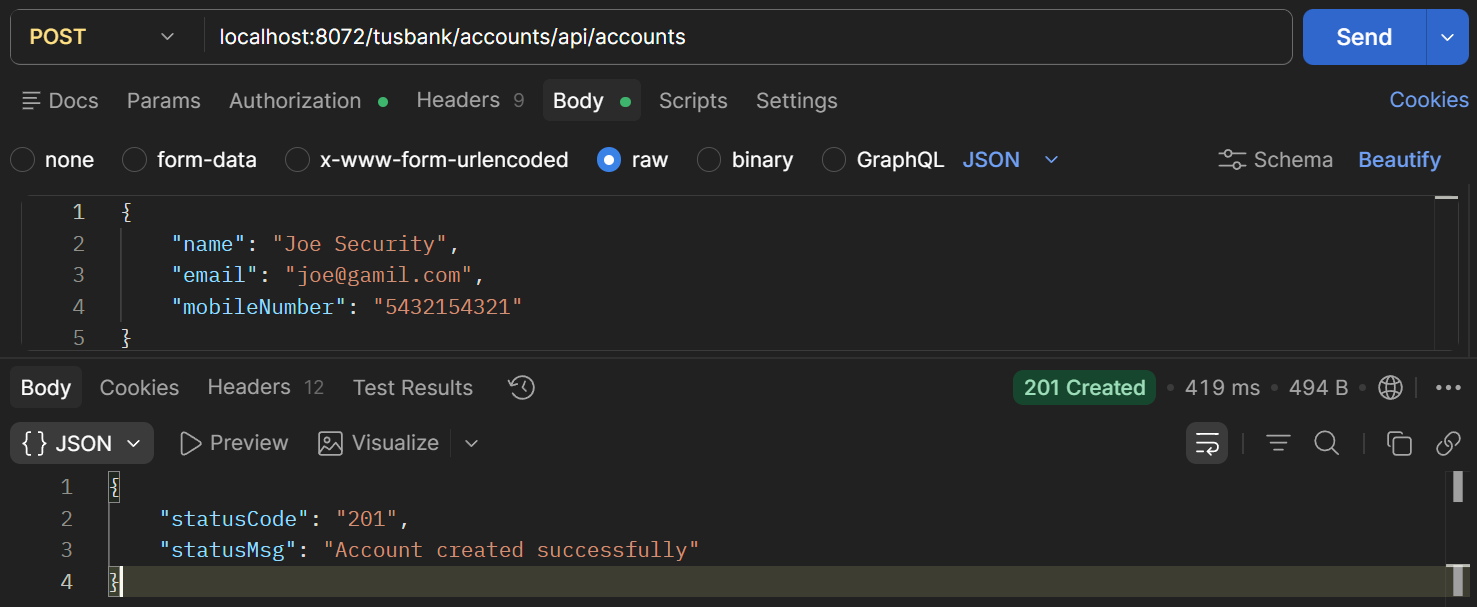
Figure 26. Postman Post New Account
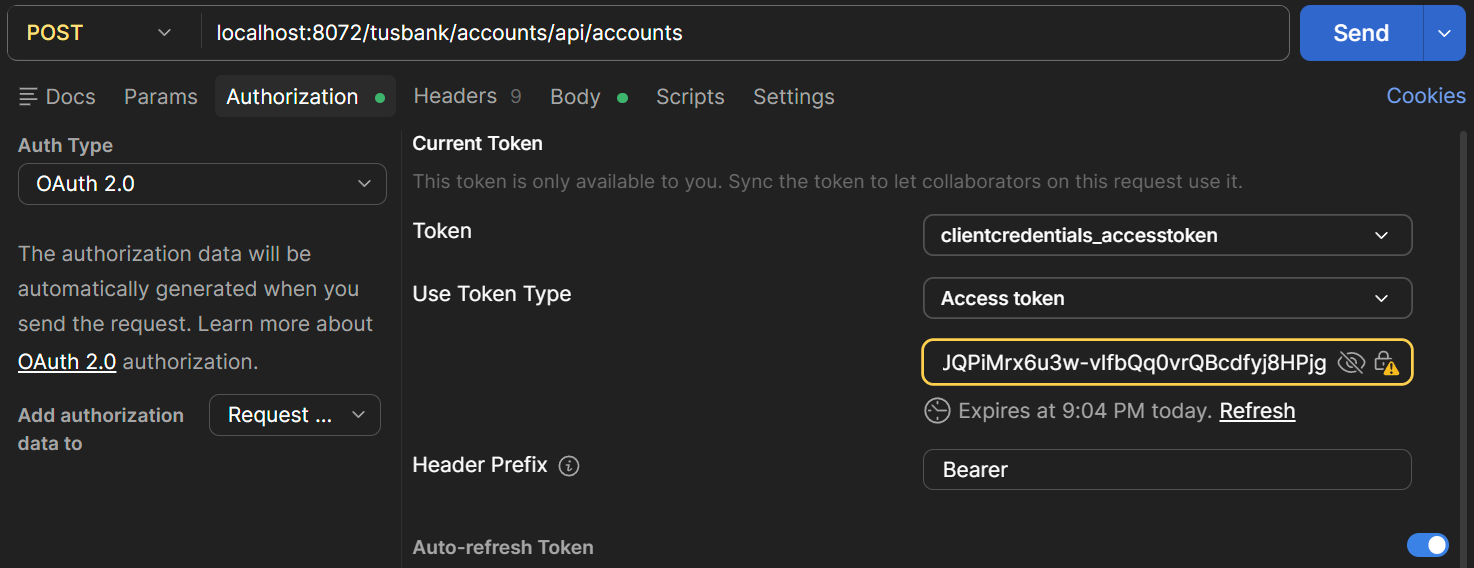
Figure 27. Postman Authorisation
Adding authorization. Configure roles based authorization
Update the gateway SecurityConfig class
| SecurityConfig | |
|---|---|
11 12 13 14 15 16 17 18 19 20 21 22 23 24 25 26 27 | |
Create roles using Keycloak
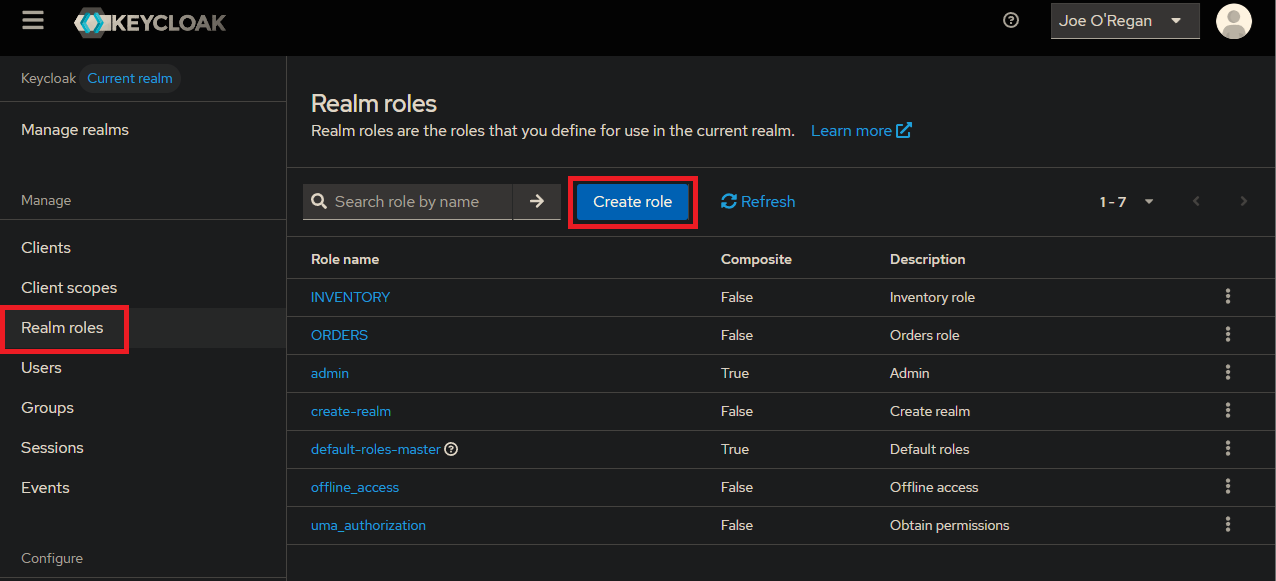
Figure 28. Keycloak Realm Roles
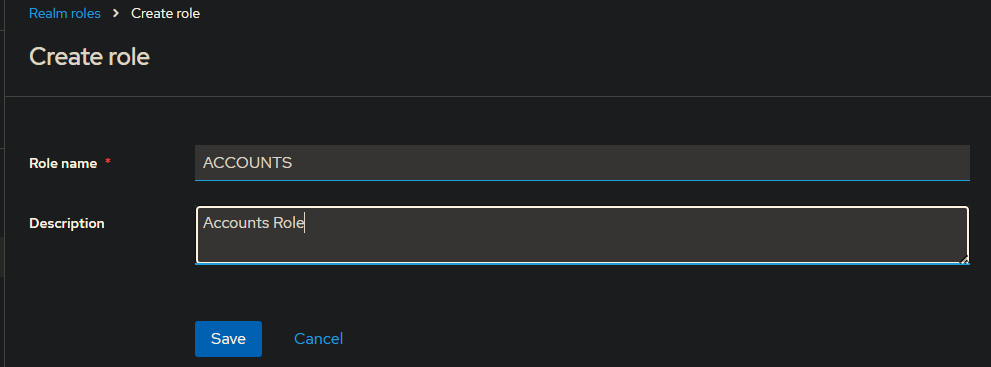
Figure 29. Keycloak Create Roles
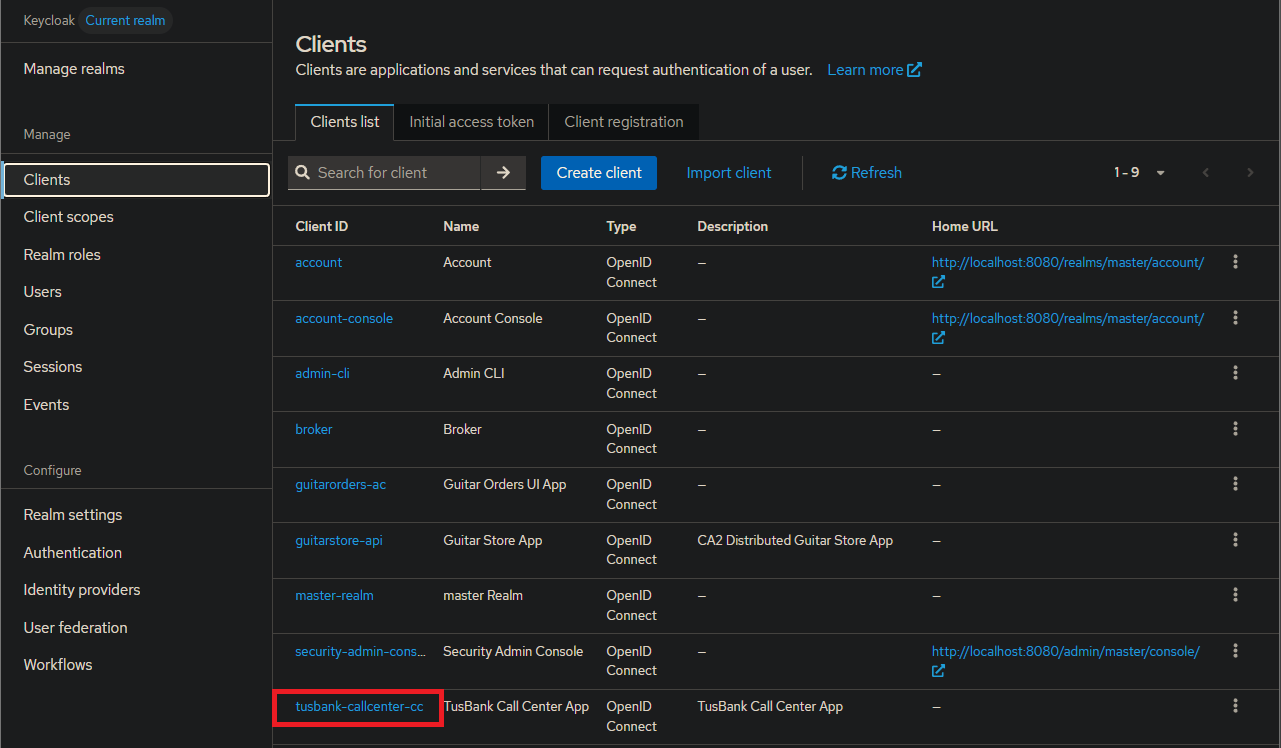
Figure 30. Keycloak Clients

Figure 31. Service Accounts Roles
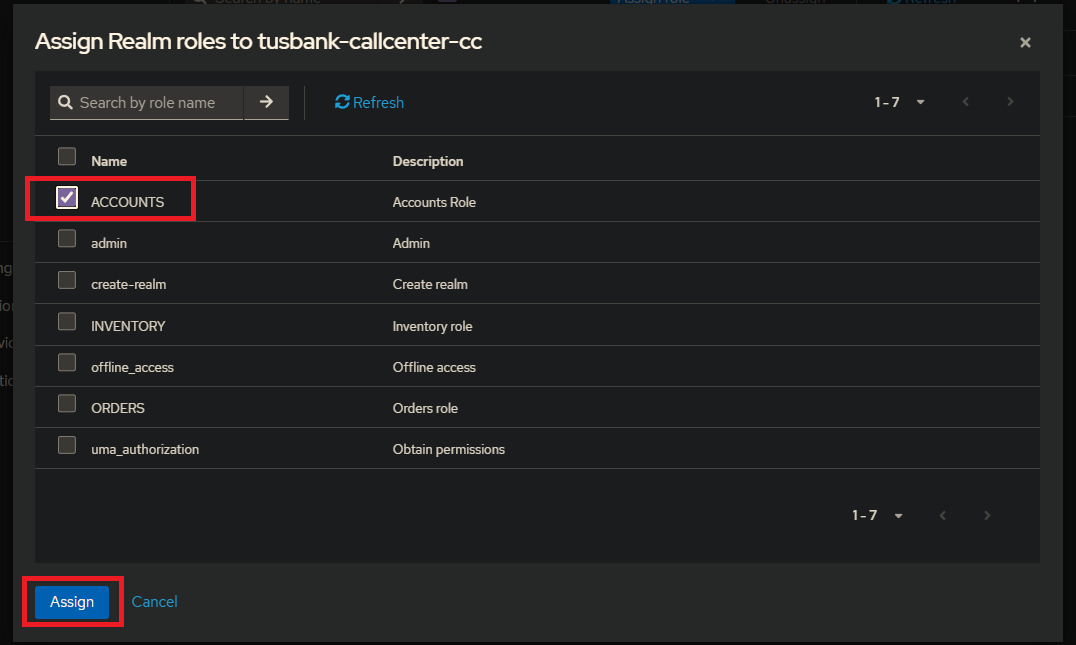
Figure 32. Assign Roles
Now try to get an access token
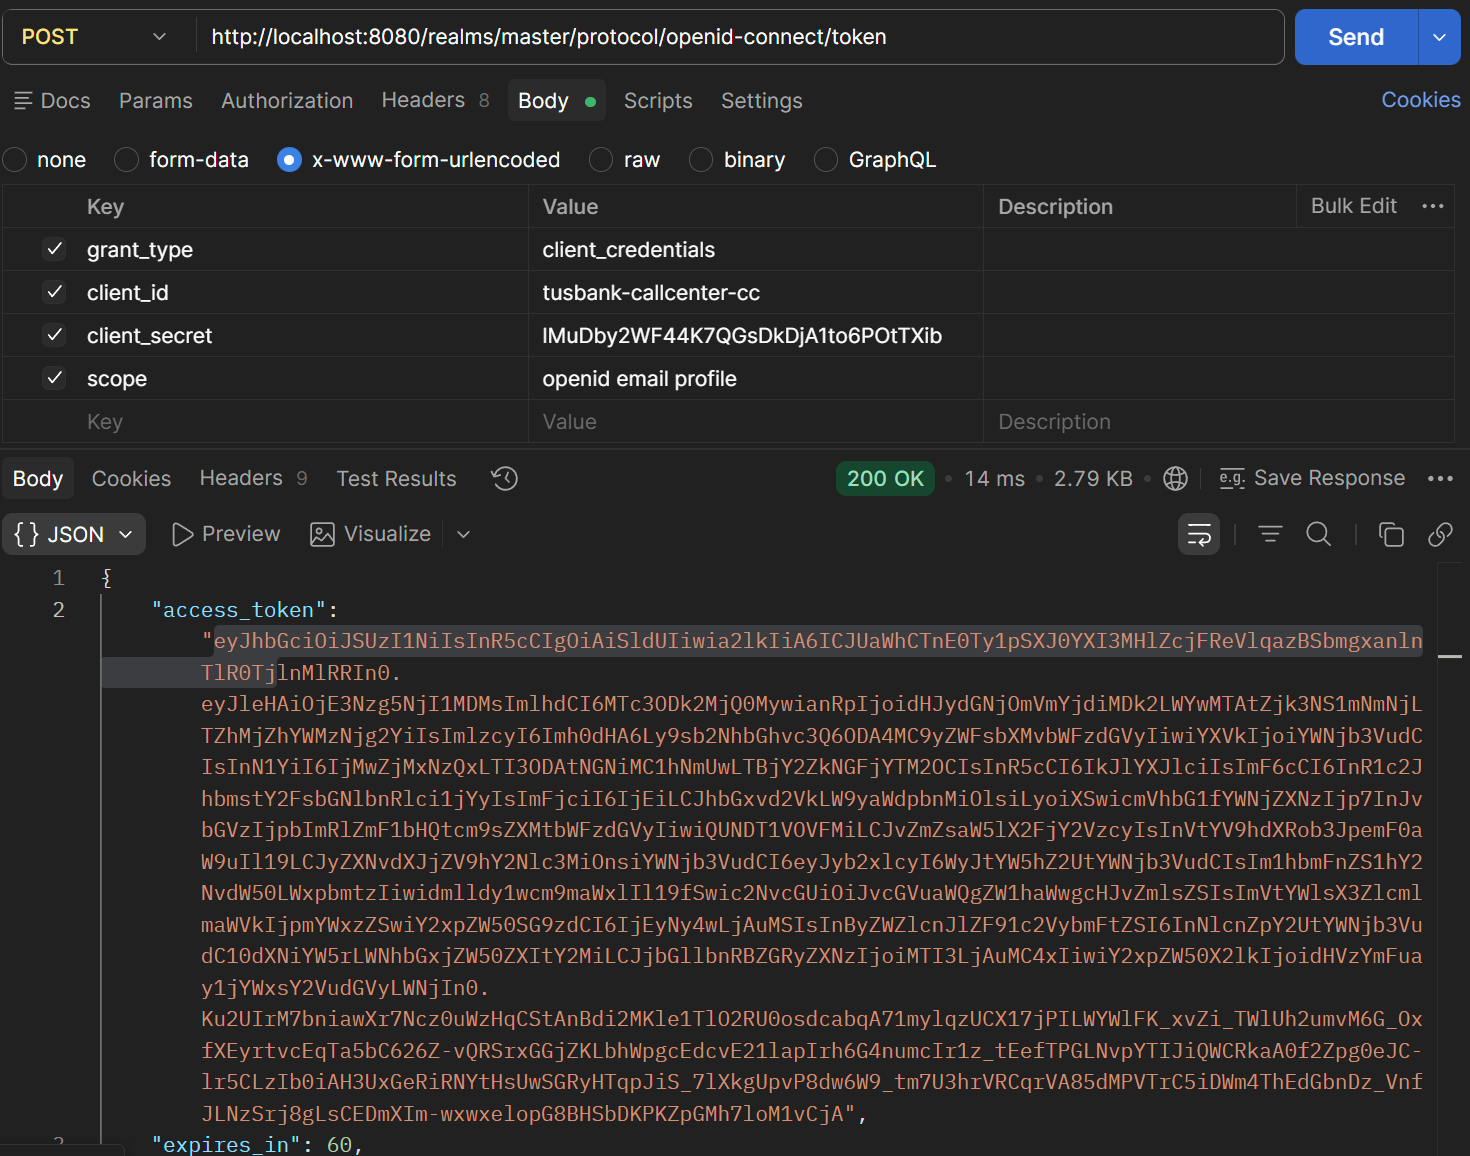
Figure 33. Postman Get Access Token
Put it into the jwt.io
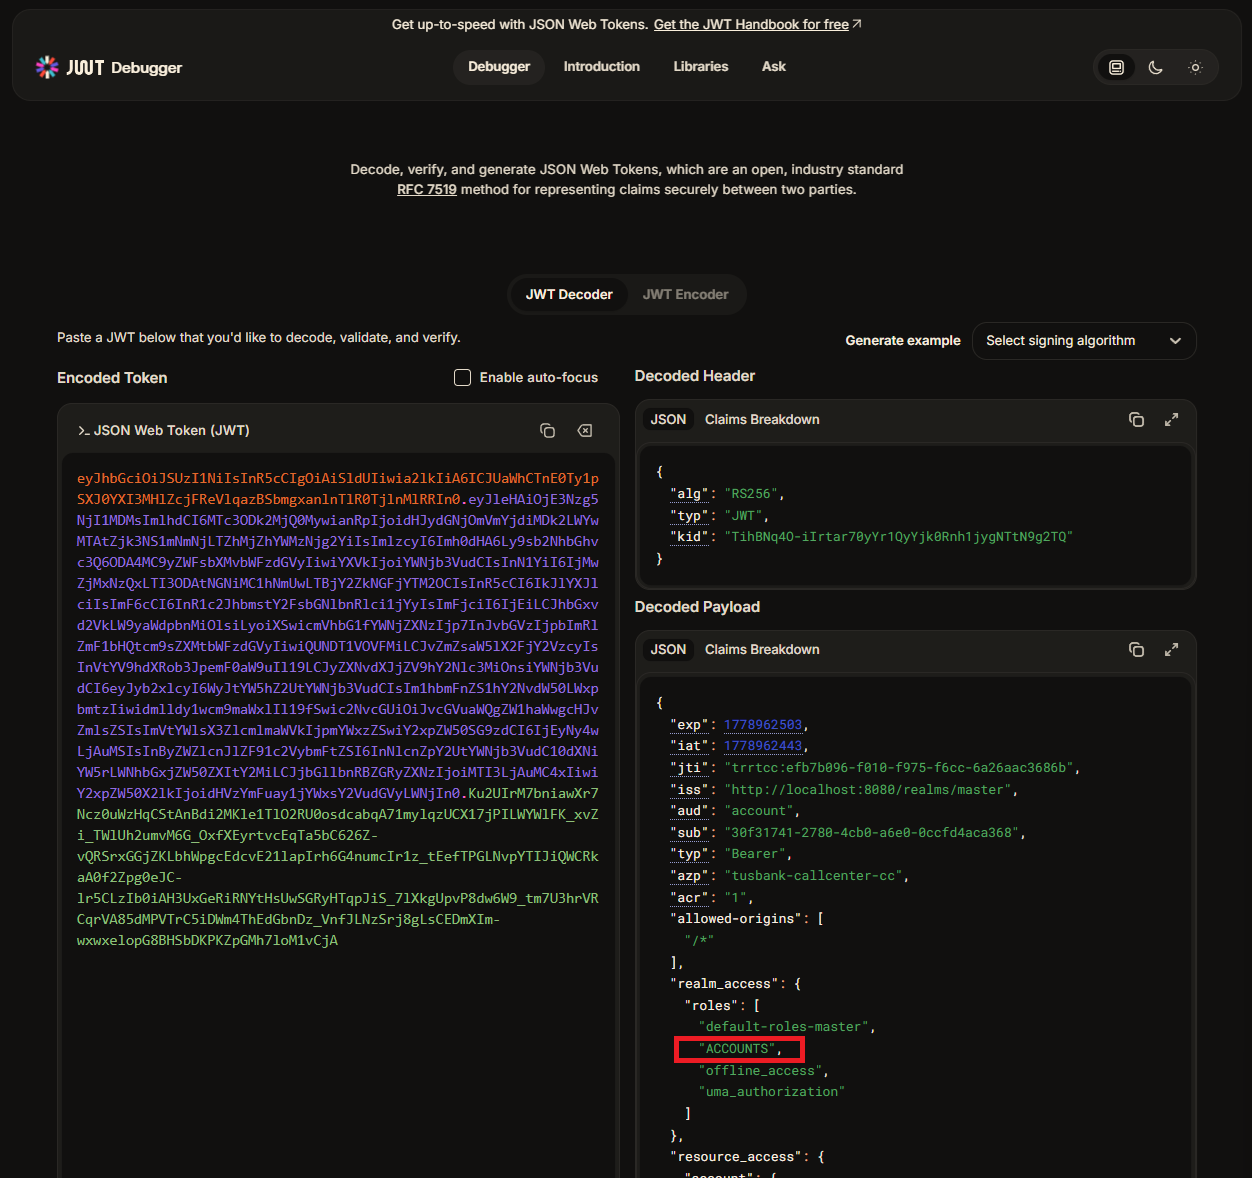
Figure 34. Decode Access Token
You can find the custom role information now included in the token.
Create a new class in the config package
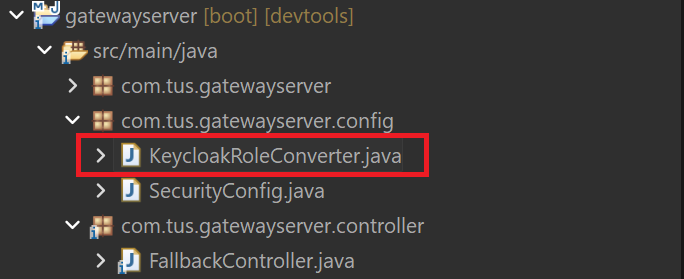
Figure 35. KecloakRoleConvertor Class
| KecloakRoleConvertor.java | |
|---|---|
1 2 3 4 5 6 7 8 9 10 11 12 13 14 15 16 17 18 19 20 21 22 23 24 25 26 | |
Code provided.
In the SecurityConfig.java add a new method
| SecurityConfig.java | |
|---|---|
35 36 37 38 39 | |
Update a line in the springSecurityFilterChain method to remove the default handling.
| springSecurityFilterChain() | |
|---|---|
22 23 24 25 26 27 28 29 30 31 32 33 | |
Got to Postman and create a new account. Generate a new access token as before.
POST localhost:8072/tusbank/accounts/api/accounts
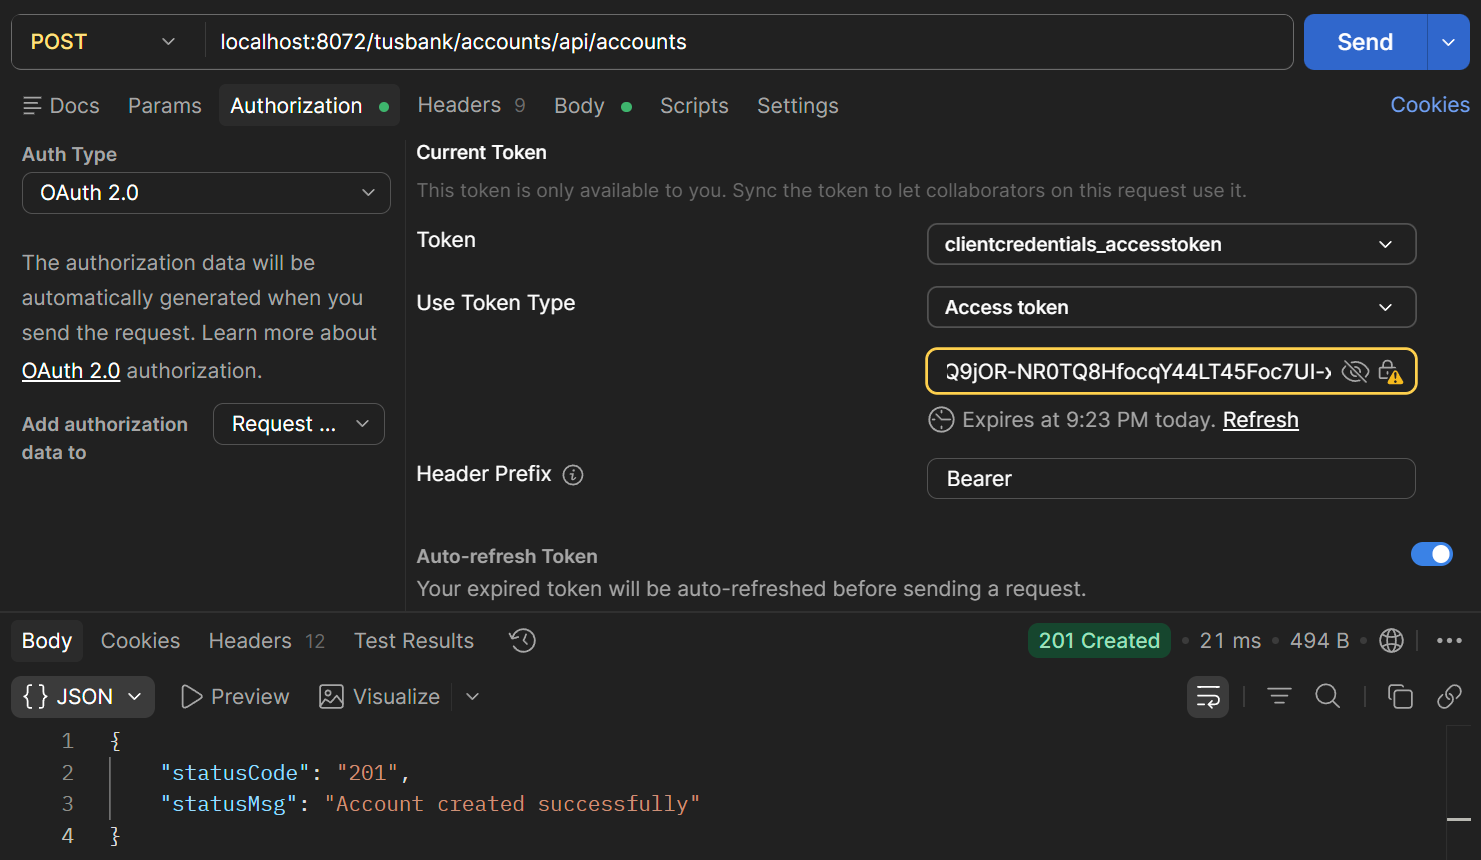
Figure 36. Postman Create New Account
POST localhost:8072/tusbank/cards/api/cards
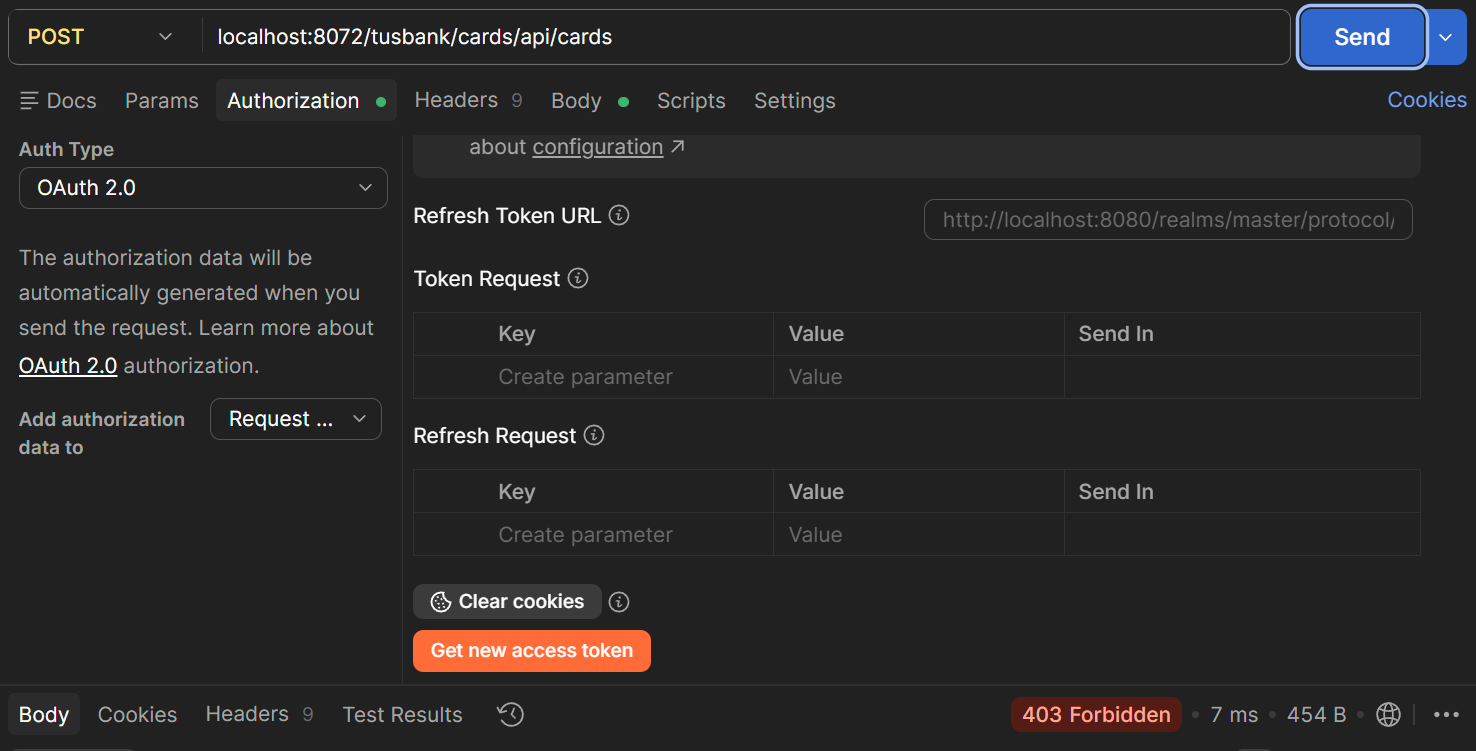
Figure 37. 403 Forbidden
This is now 403 (not 401) because I am authorized but I do not have enough privileges.
In KeyCloak, create a new role for CARDS
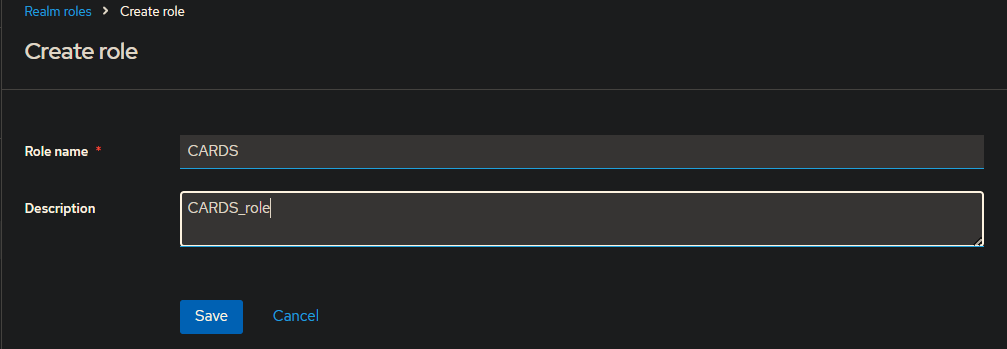
Figure 38. KeyCloak New Cards Role
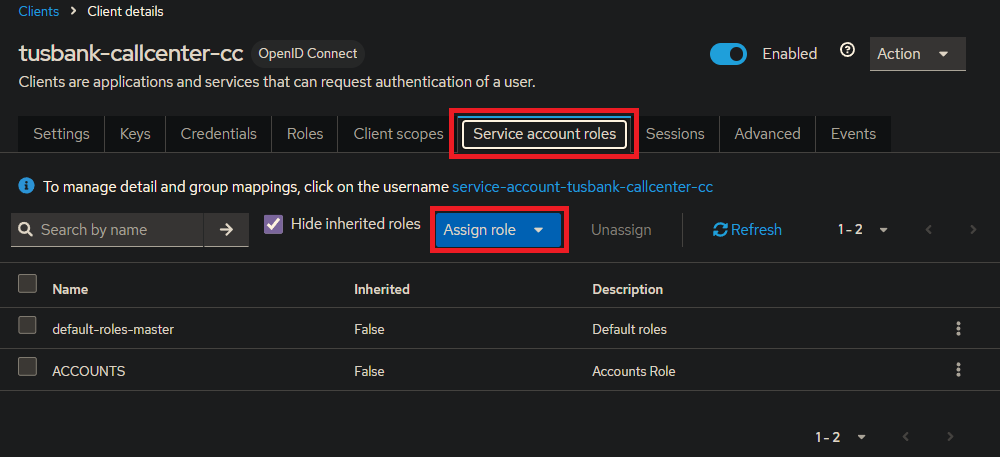
Figure 39. Service Accounts Roles
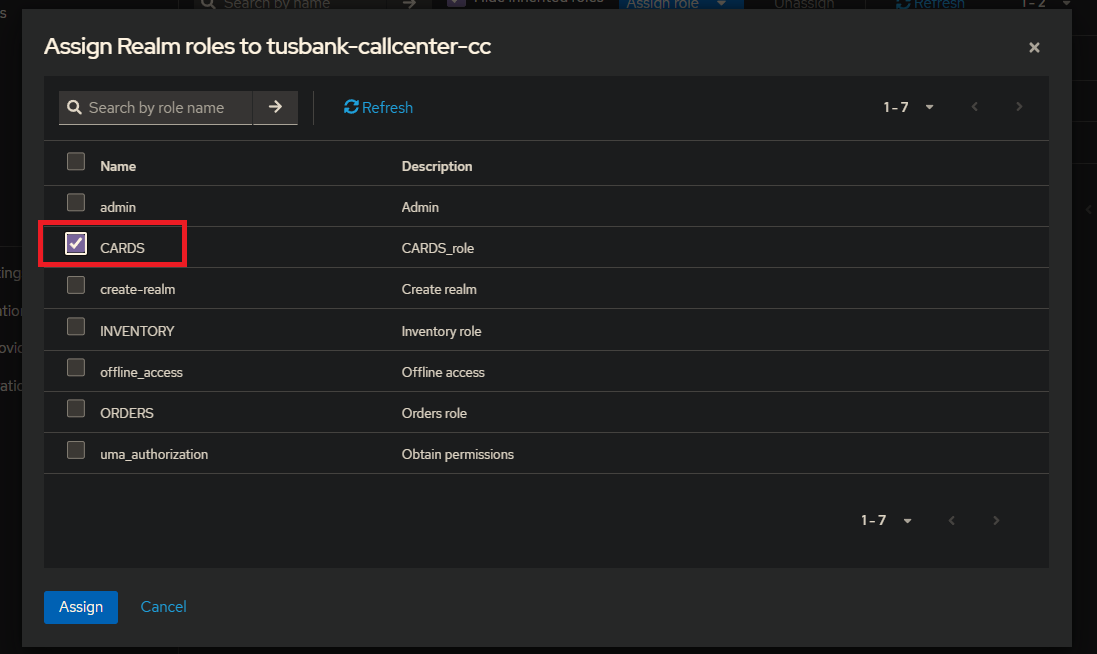
Figure 40. Assign Roles to tusbank-callcenter-cc
Test in Postman
POST localhost:8072/tusbank/cards/api/cards?mobileNumber=5432154355
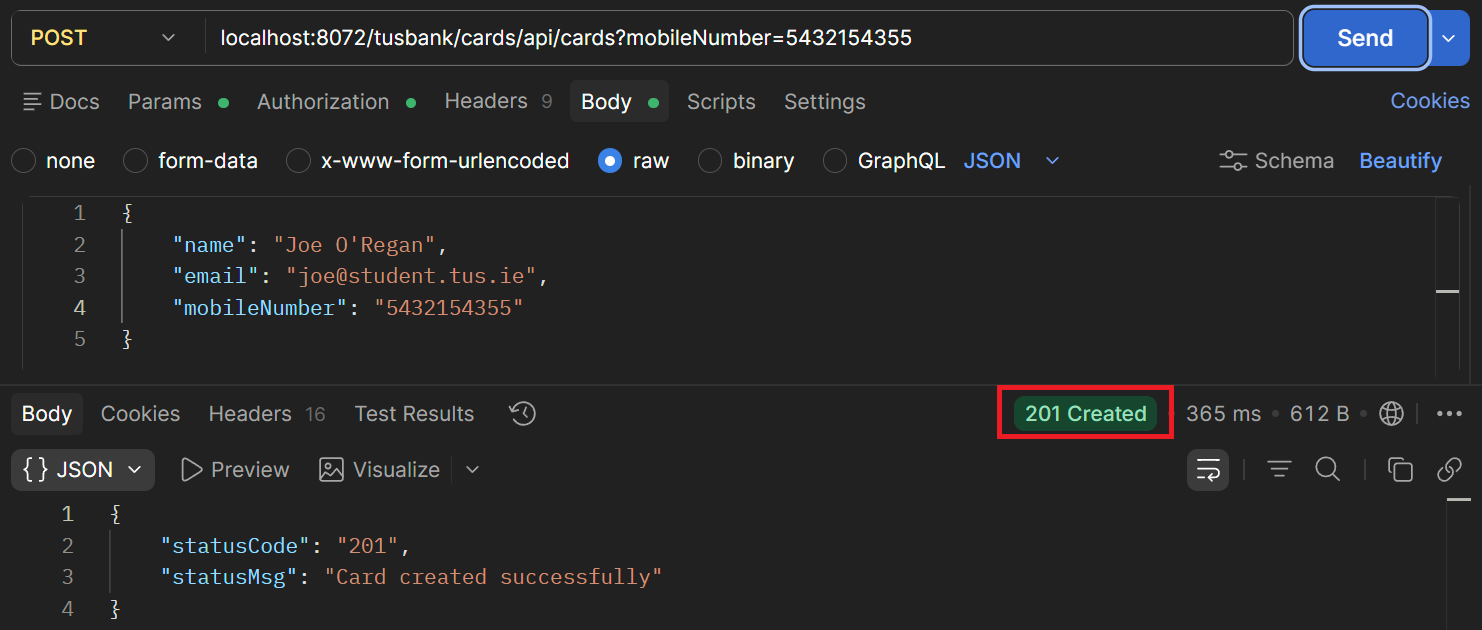
Figure 41. Test in Postman
Now also add a role for LOANS
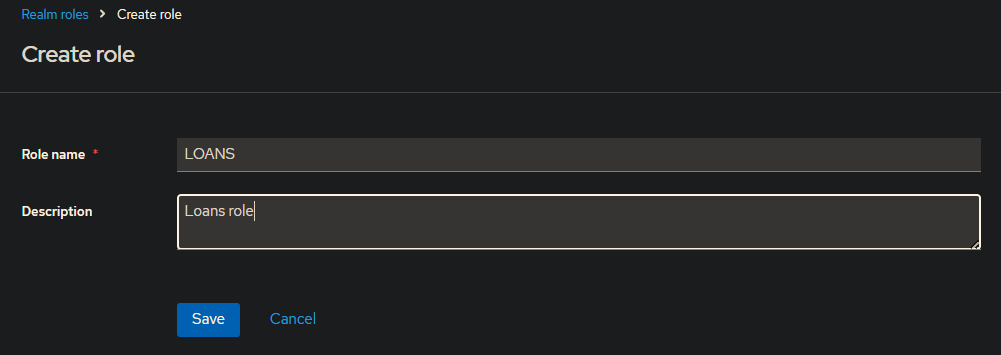
Figure 42. Create Loans Role
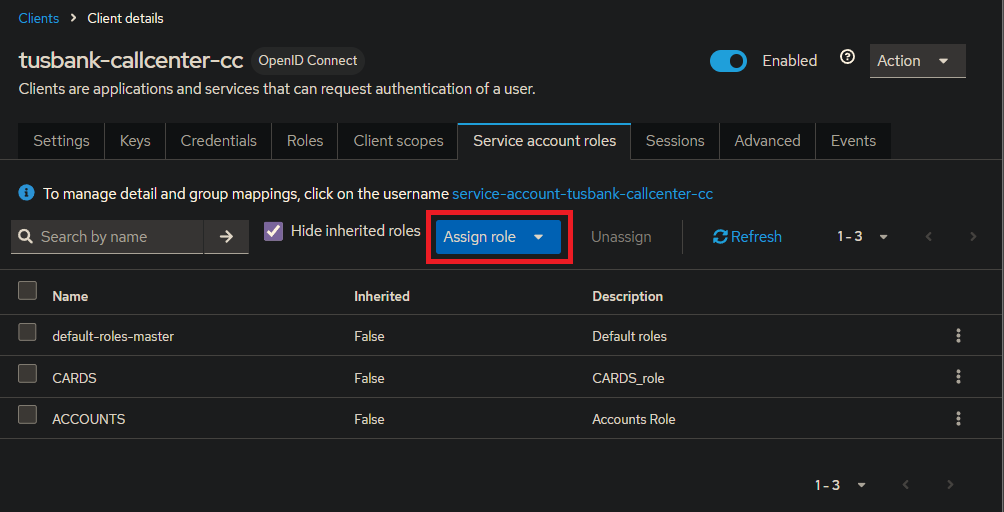
Figure 43. Assign Role
POST localhost:8072/tusbank/loans/api/loans?mobileNumber=5432154355
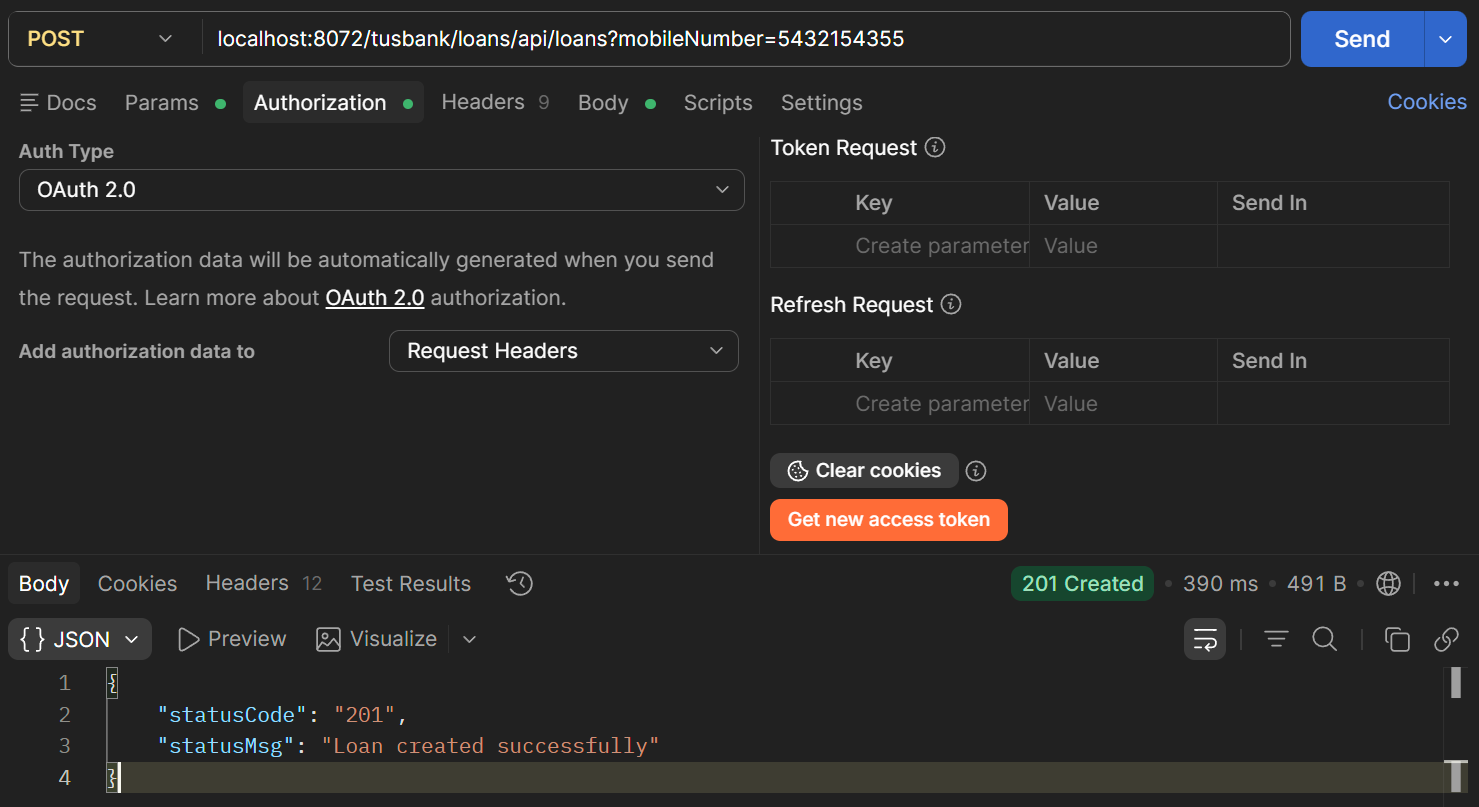
Figure 44. Authorisation